Wolcen: Lords of Mayhem – Guide to Deathless Playthrough

Quick guide for a deathless playthrough for anyone who is having trouble getting it.

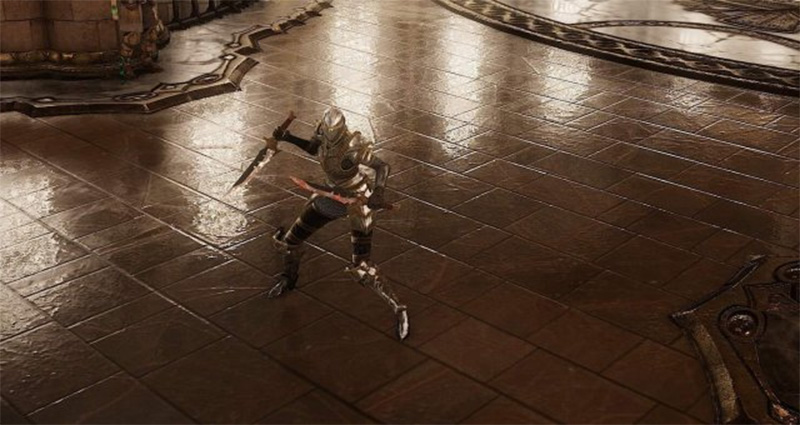
Sword and Board Deathless

Passive Tree Level 43

Stat Points

I allocated mine to 5 Toughness, 3 Agility, 2 Ferocity each level. Gives you plenty of Hp and helps keep up Atk spd and crit chance throughout the run.

This build will feel fairly slow for Act 1 but after that you should have all the tools you need to breeze through. Pick up Soldier first, this helps with maintaining Rage, next is Sacred Oath it will apply Weakness to everything within 7m when you block. Next pick up Bane of Tyranny this is where all of your damage comes from, this gives you extra damage that scales with block chance and a pretty significant amount too. Grab Salvatory Anchor and the node after it, use a Bruiser chest with a Heavy helmet this gives huge hp regen and a good amount of all resist. Make sure to pick up the smaller nodes in between to keep building hp and dmg.

Next is to start working on the opposite side of the tree, atleast with the way I have it in the image.

Go straight for Feast of the Crows for the life leech, all forms of damage you deal will heal you, feel free to take the extra 2% leech from attack dmg if you feel you need more but with how tanky you should be it shouldn’t matter. Go for Bestial Frenzy next and extra 4% dmg per enemy is nice. Finally get the dmg converters to help turn most of your dmg to physical this helps you suck up all the sweet life with attack dmg.

Skills

Skills I used:

  • Wing of Ishmir – For mobility and damage buff, you can also make it cost stamina instead but it’s not vital.
  • Sovereign Shout – Gives you all sorts of buffs for both damage and survivability, generates alot of rage too.
  • Juggernaut – Simple skill, gives you a damage shield that against bosses can make you invulnerable for a few seconds.
  • Bladestorm – The main damage of this build, you can have more health orbs spawning, increased crit on kill, fast dmg tick on crit kill and best of all you can hold it to spin everywhere.

Final skill is up to the player. I got lucky with a Unique shield – Quintet of Sundowns. Gives massive Hp and Hp regen boost and allows you to use sacred spells, I used Bulwark of Dawn because of this giving me some healing and a little extra damage. If you get the shield great, if not I would try Warpath or Flight of Gaavanir. They both add something to the build, just depends on how you want to play.

Gearing

The only piece I got throughout my run the seemed to make a difference was the Quintet of Sundown shield, I got it around lvl15 and I’m still using it in the end-game. Any one-handed weapon will do just use whatever gives you the most dps. Chest needs to be Bruiser, Helm needs to Heavy other than that stick with bruiser and heavy gear for all other pieces. For rings I used a Material resist and an Hp ring, for Amulet I used Omnistar and for belt I swapped between Champion Girdle and Utility Belt just depending on which had better traits at the time.

Gear Stats to Look Out for

Defense – high to low priority – Flat Hp unless above 20%, Flat Hp Regen, Flat all resist, +% all resist, 100+ to resist catagory eg.

Material / Elemental / Occult

Any damage stats – high to low priority – +Attack / Physical / Rend / Toxic dmg, +% Material dmg, Atk spd, Crit chance, crit dmg.

Gems

Defensive

Go for Block chance (Defensive I) until you are around 40-50% after that use Hp gems (Defensive III).

Offensive

Flat Physical (Offensive I).

Support

+ % Physical (Support II) and +% Attack crit chance (Support I). I used 2 of each.

Wolcen: Lords of Mayhem – Projects Guide (How to Unlock and Start)

This guide explains how to unlock and start projects in Wolcen: Lords of Mayhem.

Guide to Projects

Introduction

Projects in Wolcen: Lords of Mayhem is part of the endgame feature Champion of Stormfall that is only unlocked after completing all three acts of the campaign. Starting a project allows the player to construct various Buildings around Stormfall, not only will the player build an empire and create various branches, but it also unlocks new gameplay features as well as different upgrades. This page covers an overview of all the projects that can be found in the game, for detailed information on the Buildings.

Projects in-game interface

Starting a Project

Once you’ve unlocked Champion of Stormfall, the first Building that will be available is the Stormfall Palace. It is recommended that you start projects in the Stormfall Palace to unlock more projects for other buildings, then it is up to you to choose which project you would like to start on depending on your preference. Of course, starting a project will have its requirements, some projects require other projects to be completed first and it usually requires a combination of the following in-game currencies: Gold, Primordial Affinity, and Productivity Points. In order to check on buildings, speak to Thunderblade Zalahir or press [ N ] to open the Stormfall Overview Screen in Stormfall, and to start a Project, select a building to view the available Projects, upgrades, and its related information.

Acquiring Resources for a Project

As mentioned, projects require other projects to be completed first and it usually requires a combination of the following in-game currencies: Gold, Primordial Affinity, and Productivity Points. Farming Gold is easy since you simply need to explore dungeons, complete it, loot it from the environment and enemies, or as rewards, Primordial Affinity can be obtained by consuming Enneracts that have skills that you have already learned or by selling it to Demetra in Stomrfall, while Productivity Points can be obtained if you successfully complete a Turn, and by doing this, players will need to undertake and complete an Activity (Mandates or Expeditions). The harder the challenge, the more Productivity will be added to your various Projects. If the Activity fails, the turn will not pass – players can select Activities from the Mandates Board or the Expedition Map in Stormfall.

Wolcen: Lords of Mayhem – All Activities List (How to Unlock)

Activities in Wolcen: Lords of Mayhem are intruded once the players finish the main Quest line and unlocks the Hero Of Stormfall endgame content. Activities allow players to explore random dungeons and maps with increased difficulty that provide with better rewards.

Guide to All Activities

How to Unlock This Feature?

Players can start performing activites once the endgame mode: Champion of Stormfall has been unlocked, this can be obtained after completing all three acts of Wolcen’s campaign. Upon completing all three acts, the player’s character returns to Stormfall as a champion who is beloved by people and is also appointed as Regent by the noble house.

The Champion of Stormfall

As regent and champion, players will be given the task to manage the city of Stormfall, this will also give the opportunity to continue to strengthen abilities and stats of the player’s character by completing projects and participating in countless dungeons and expeditions. In order to start your duty, speak to Thunderblade Zalahir or press [ N ] to open the Stormfall Overview Screen

All Activities in Wolcen: Lords of Mayhem


Mandates Board

The Mandates Board is located to the right of Stormfall. Players can start exploring simple dungeons for loot. Once you have accepted a Mandate a portal will appear that you can enter to begin.

Expeditions

Players can use the Expeditions Map to accept quests to explore difficult dungeons for greater rewards. Expeditions consist of endless floors (one for each map) that players can explore to face enemies and gather loot. Once an Expedition has started, players can only come back to Stormfall when reaching the end of a floor. If players decide to continue, the dungeon will become more challenging but the rewards will be increased.

The difficulty and rewards can be further increased by adding Area Modifiers. Players can  use gold to click on the “Roll Area Modifiers” button and add them to the Expedition. If enough Area Modifiers are added to the Expedition, powerful enemies may appear granting additional rewards.

Some unique Expedition destinations can be accessed by using Special Missions items.

Once players have accepted the quest, a portal will appear heading to the Expedition.

Wolcen: Lords of Mayhem – Comprehensive Guide to Stats and Attributes

This guide will show all information about stats, attributes, survivability, miscallaneous, resources and status ailments that you need.

Full Stats and Attributes Overview

Introduction

Stats & Attributes for Wolcen: Lords of Mayhem covers the various attributes of the playable character. In this guide you can find all the information related to Attributes, Stats, Status Ailments, Character Stats, etc.

Attributes

Ferocity

Your total Ferocity. Affects your Attack Critical Chance Score and Spell Critical Chance Score.

  • Attack Critical Chance Score: Modifier applied to your Attack Critical Chance value.
  • Spell Critical Chance Score: Modifier applied to your Spell Critical Chance value.

 
Toughness

Your total Toughness. Affects your Maximum Health and Maximum Force Shield.

  • Health: Your current Health Points. You lose them when enemies hit you, and die if they reach 0.
  • Force Shield: Your total Force Shield, it protects your health from most damage until it’s empty. When the Force Shield Regeneration Delay is over, it will be recovered at the rate of the Force Shield Regeneration.

 
Agility

Your total Agility. Affects your Attack Speed Score and Spell Casting Score.

  • Attack Speed Score: Speed modifier applied to your attacks.
  • Spell Casting Score: Modifier applied to your Spell Casting Speed.

 
Wisdom

Your total Wisdom. Affects your Attack Status Chance Score and your Spell Status Chance Score.

  • Attack Status Ailment Chance Score: Modifier applied to your Status Ailment Chance with all attacks.
  • Spell Status Ailment Chance Score: Modifier applied to your Status Ailment Chance with all spells.

Attribute Points

Your remaining Attribute Points. You earn them when gaining levels and spend them between Ferocity, Toughness, Agility and Wisdom.

Attribute Amount

Your current Attribute amount. The gauge represents your investment into that attribute compared to the expected value at your level. It also indicates if the attribute is Primary, Secondary, Tertiary or Quaternary depending on the gauge.

Bonus Damage from Attributes

Bonus Damage gained from the Attribute points assigned. The Primary Attribute gives more bonus damage than the Secondary and so on.

Reset Attributes

The amount of gold required to reset your Attribute Points. This will allow you to re-assign them.

Reset Passives

The amount required to reset all Passive Skills. This will allow you to re-assign them.

Primary Stats

Health

Your current Health Points. You lose them when enemies hit you, and die if they reach 0

Force Shield

Your total Force Shield, it protects your health from most damage until it’s empty. When the Force Shield Regeneration Delay is over, it will be recovered at the rate of the Force Shield Regeneration.


Experience

Your current experience at this level. You can gain experience by killing monsters and achieving Quests. Reaching the experience cap will increase your Character Level.

Level

Your current level. Acquiring enough experience will reward you with more levels. Increasing levels provide you with additional Attribute Points.

Each time you level up you will be rewarded with 10 Attribute Points.

Combat Stats

Average Damage

  • Your average Damage Rate with equipped weapons, given their Damage and Attack Speed.

Attack Speed Bonus

  • The Attack Speed added to your Base Attack Speed. Your Base Attack Speed depends on your Weapon.

Critical Chance (Weapons)

  • Your Critical Chance with Weapons. Critical Hits deal extra damage.

Critical Damage (Weapons)

  • Your Critical Damage multiplier with Weapons. Represents the extra amount of Damage dealt by Critical Hits.

Damage

  • Weapon Damage: The average Damage you deal in one strike with your equipped Weapon.
  • Physical: Physical Damage is the default Damage type for Weapons
  • Frost: Frost Damage has a natural chance to Freeze their target.
  • Lightning: Lightning Damage has a natural chance to Shock their target.
  • Ailment Chance: Your chance to inflict Ailments with equipped Weapon (s)
  • Freeze Chance: Your total Chance to Freeze with Frost Damage
  • Rage on Hit: The amount of Rage Points generated each time you hit an enemy with a Weapon (except Staves)

Survivability

  • Health: Your current Health Points. You lose them when enemies hit you, and die if they reach 0.
  • Health Regeneration: The amount of Health Points you restore each Tick.
  • Health Regeneration Rate: The time between each healing tick from your Health Regeneration and your Life Leech
  • Attack Life Leech: The Percentage of Damage from Attacks which fill your Life Leech Pool. The Life Leech Pool is consumed to heal you when your Health Regeneration ticks
  • Spell Life Leech: The Percentage of Damage from Spells which fill your Life Leech Pool. The Life Leech Pool is consumed to heal you when your Health Regeneration ticks
  • Force Shield: Your total Force Shield, it protects your health from most damage until it’s empty. When the Force Shield Regeneration Delay is over, it will be recovered at the rate of the Force Shield Regeneration.
  • Force Shield Regeneration: The amount of Force Shield you restore per second when your Force Shield Regeneration Delay is over
  • Force Shield Regeneration Delay: The amount of time without taking damage until your Force Shield Regeneration starts.
  • Block Chance: Your total Block Chance. Blocking an attack will reduce its effects based on your Block Efficiency. Block Chance is usually gained by equipping a Shield
  • Block Efficiency: Your total Block Efficiency. It represents the percentage of damage negated from a blocked attack.
  • Presence: Your current Presence level. Affects how enemies spot and target you in combat. A normal value for Presence is 100%: below, you become harder to target and see. At 0% you are invisible. At values higher tan 100%, you are easier to spot and track.
  • Dodge Chance: Your total Dodge Chance against all incoming attacks. Dodging attacks will completely ignore their effects, regardless of their type.
  • Movement Speed: Your total Movement Speed.

Resistance Types

Material

The Material resistance type affects Physical, Toxic and Rend Resistances.

  • Physical: Physical Damage is the default damage type for Weapons.
  • Toxic: Toxic damage has a natural chance to inflict Poison which deals Toxic Damage over time to its target.
  • Rend: Rend damage. It has a natural chance to apply Bleed on their target.

Elemental

The Elemental resistance type affects Fire, Frost and Lightning Resistance.

  • Fire: Fire Damage, it has a natural chance to apply Burn on their target.
  • Frost: Frost Damage has a natural chance to Freeze their target.
  • Lightning: Lightning Damage has a natural chance to Shock their target.

Occult

The Occult resistance type affects Aether, Sacred and Shadow Resistance.

  • Aether: Aether Damage has a natural chance to inflict Stasis on its target.
  • Sacred: Sacred Damage has a natural chance to inflict Weakness on its target.
  • Shadow: Shadow Damage has a natural chance to apply Cursed to its target.

Status Ailments

Max Ailment stacks

The maximum number of stacks you can pile up on a unique target for each distinct Status Ailment. Most Status Ailments increase in power the more stacks you put on the same target, and they all have their independent stack counter


Stun

Your ability to use the Stun Ailment effectively. Stunning interrupts and prevents targets from acting or moving for a short period of time.

  • Stun Chance Score: The Stun Chance Score is the main modifier to your Stun Chance.
  • Stun Duration: The default duration of the Stun.

Poison

Your ability to use the Poison Ailment effectively. Poisoning deals Toxic Damage over time and can be stacked up to your maximum Ailments stack number.

  • Poison Chance Score: The Poison Chance Score is the main modifier to your Poison Chance.
  • Poison Damage: The Toxic Damage per Stack inflicted each time the Poison Ailment ticks. The first displayed value corresponds to one Poison stack whereas the second one represents the Damage for the maximum number of stacks you can put on one target.
  • Poison Rate: The delay between each damage tick from a Poison Stack.
  • Poison Duration: The default duration of the Poison.

Bleed

Your ability to use the Bleed Ailment effectively. Bleeding deals Rend Damage over time and can be stacked up to your maximum Ailments stacks number.

  • Bleed Chance Score: The Bleed Chance Score is the main modifier to your Bleed Chance.
  • Bleed Damage: The Rend Damage per Stack inflicted each time the Bleed Ailment ticks. The first displayed value corresponds to one Bleed  stack whereas the second one represents the Damage for the maximum number of stacks you can put on one target.
  • Bleed Rate: The delay between each damage tick from a Bleed Stack.
  • Bleed Duration: The default duration of the Bleed stacks.

Burn

Your ability to use the Burn Ailment effectively. Burn deals Fire Damage over time and can be stacked up to your maximum Ailments stacks number.

  • Burn Chance Score: The Burn Chance Score is the main modifier to your Burn Chance.
  • Burn Damage: The Fire Damage per Stack inflicted each time the Burn Ailment ticks. The first displayed value corresponds to one Burn stack whereas the second one represents the Damage for the maximum number of stacks you can put on one target.
  • Burn Rate: The delay between each damage tick from a Burn Stack
  • Burn Duration: The default duration of the Burn.

Freeze

Your ability to use the Freeze Ailment effectively. Freezing prevents targets from acting or moving.

  • Freeze Chance Score: The Freeze Chance Score is the main modifier to your Freeze Chance.
  • Freeze Duration: The default Freeze duration.

Shock

Your ability to use the Shock Ailment effectively. Shocking inflicts Lightning Damage to shocked enemies in a small area around your target. It can be stacked up to your maximum Ailments stacks number

  • Shock Chance Score: The Shock Chance Score is the main modifier to your Shock Chance.
  • Shock Damage: Lightning Damage per Stack inflicted each time the Shock Ailment ticks. The first displayed value corresponds to one Shock stack whereas the second one represents the Damage for the maximum number of stacks you can put on one target.
  • Shock Tick: The delay between each damage tick from a Shock stack.
  • Shock Duration: The default duration of the Shock.

Stasis

Your ability to use the Stasis Ailment effectively. Stasis slows the movement and attacks of the target and can be stacked up to your maximum Ailments stacks number.

  • Stasis Chance Score: The Stasis Chance Score is the main modifier to your Stasis Chance.
  • Efficiency: The global duration modifier applied to Stasis.
  • Duration: The default duration of Stasis.

Weakness

Your ability to use the Weakness Ailment effectively. Weakness reduces all the Resistances and Damages of the target. Weakness can be stacked up to your maximum Ailments stacks number.

  • Chance Score: The Weakness Chance Score is the main modifier to your Weakness Chance.
  • Efficiency: The global Efficiency of the Weakness you inflict, scaling up its different effects. The first displayed value corresponds to one Weakness stack whereas the second one represents the Efficiency for the maximum number of stacks you can put on one target.
  • Duration: The default duration of Weakness.

Cursed

Your ability to use the Cursed Ailment effectively. Cursed may spread the target’s Status Ailments to its nearby allies (excepted the Cursed itself). Cursed can be stacked up to your maximum Ailments stacks number.

  • Chance Score: The Cursed Chance Score is the main modifier to your Cursed Chance.
  • Efficiency: The Chance per Stack to spread a Status Ailment stack each time the Cursed Ailment Tick. The first displayed value corresponds to one Cursed stack whereas the second one represents the Efficiency for the maximum number of stacks you can put on one target.
  • Duration: The default duration of Cursed.

Resources

  • Resource Pool: Your maximum available resources, in both Willpower and Rage.
  • Willpower on Hit: The amount of Willpower Points generated each time you hir an enemy with a Staf..
  • Rage Conservation: The delay before Willpower Regeneration restarts after gaining Rage. Rage Conservation is not triggered by spending Willpower or Rage.
  • Stamina: The maximum amount of Stamina points available. Stamina Points allow you to Dodge Roll.
  • Stamina Regeneration: The delay to restore a Stamina point that has been spent.

Miscallaneous

  • Experience: Your current experience at this level. You can gain experience by killing monsters and achieving Quests. Reaching the experience cap will increase your Character Level.
  • Health Globes Pickup Radius: The total radius for automatically picking Globes around you
  • Gold Pickup Radius: The total radius for automatically picking Gold around you.
  • Magic Find: The Magic Find modifier. Increases the probability of looting Uncommon items.

Risk Factions – Competitive Tactics and Tips

This guide is to help new players who wanted feedback to be able to become better players in the Risk Factions Mode. I created this guide looking at all the aspects of basic strategy to survive, and hope to become the winner of a game!

Guide to Tactics and Useful Tips

Capital Placement, Objective Awareness, Turn Placements

  • When playing automatic territory placement, the first thing you should do is look at your objectives.
  • You must try to protect your capital as good as you can so that if there is an objective that implies taking over an enemy capital, yours isn’t the one targeted.
  • You would want to have your capital adjacent to a territory of your property, in case someone does take it, you can retake it on the next turn.
  • You want to know your turn placement to know who goes before your first turn, so that you can prevent putting your capital next to the territories that players that play before you have.
  • You want to have the person that goes after you not before, and also, the person that goes before you but have to focus on his capital or continent rather than just go for your cap. Also be aware of who is the color that is 5th place, this player can be your biggest threat because he has 2 cards at the beginning of the game, and can suddenly gather many troops.

Realize that the game strategy changes every turn, plan your tactic!

  • On every turn, Long term what is the continent that you can conquer without having conflicts with other players.
  • On every turn, check if your capital needs defending.
  • On every turn, check how many cards other players have and what objectives you can try to prevent them from taking and putting yourself to take.
  • On every turn, check what player is about to get a continent, so that you be aware of what territories he has outside of that continent that can directly be used to attack you or your continent that you want to conquer. (take him out before he makes a front to your task).

Never spread yourself too thin!

  • When you loose a war or a lot of troops, set yourself to earn stars and let the powerful players attack each other while you build up.
  • If you are in danger of dying ,Don’t hold your stars too long because you will be giving another player the thought to kill you for your cards.
  • Try to defend your territories but have 1 that you can attack from.
  • You can’t have, 4 territories with 4 troops, when you are the 3rd 4th or 5th place, because if you are on the way of someone, they will attack it, Instead you want to have 3 territories with 3 and then 1 with 7 in this example.
  • Sometimes is better to not get a card and guarantee that you survive another turn. By you not getting a card after spreading yourself too thin, doesn’t give an incentive for players to kill you, since they don’t gain the troops that they used on you back.

When you have the advantage think big and small

  • When you are the one winning, think small, remember that other players know that you are the one winning, therefore they will target you, as a result any mistake that you make, they will use against you.
  • Think Big! if other players don’t get any bonus from continents, nor get many troops per turn it will help you beat them after a few turns. target the player that has the most cards, and if you can make a run and succeed on killing a player, wisely try to do it. but make sure that by doing so you don’t give the kill to another player, nor you leave yourself oblivious to the other players in the game, and that players ends up taking you out and winning the game for doing what you did.

Make sure that if you take completely the possibility of someone to win, you are the one that’s going to ensure their death is defined by the end result of you winning.

Understanding The Objectives of Risk Factions

In the bottom right corner there are your three guidelines of every game.

  • The Graphic Bar choice, gives you the turns, and each individuals descriptions (Amount of Troops, Amount of Territories, Which Capitols they have, the Cards, and the amount of objectives they have (Good for command room games). (Press 1 to open during game)
  • The World Map choice, gives you a layout of the map, the bonuses that each continent give, and a slight overview of the territories needed for a complete continent. (Press 2 to open)
  • The Color Faction Choice, tells you what you have to do in order to get an objective and what the objective does. (Press 3 to open)

I categorize the objectives from what the amount of threat that they give

Hardest to easier based on dice technicalities.

  • Defense Die Is the hardest to go up against. Regularly when going against an enemy territory, if they have more than 1 troop, you have to phase up to two dice per round. If the enemy gets a 6 they automatically win, and if you get a 1 you automatically lose. With that being said when you have defense dice, you’re even more likely to win or have trades with the opponent that is trying to attack you.
  • Starting maneuver Starting maneuver is the second hardest to go up against. If a player has a lot of troops but they are equally spread out to defend a certain area, (s)he can combine two areas into one attack, and it can be difficult to defend against it. Since (s)he will be gathering a lot of troops all at once and you can’t really estimate how many troops you need to have to defend yourself against it. Something you can do is to attack the territory in between two strong territories, so that he can’t maneuver 1 to the other.
  • Airfields is third because of it’s effect on offense and defensive rounds. It adds 1 to your highest roll. When you are defending with an airfield, if you get a 5 as your highest dice, you will be able to trade or counter the opponent. When you are attacking, with it, you can finally beat the defensive players’ 6 if you get a 6 yourself.
  • Two Troops This one is life saver and a game changer. Any player can come from near death to stability. Normally a continent will give you 2 extra troops minimum (in classic map) for having a continent. Imagine getting the same without having the continent, but same amount of territories and less threat of loosing the bonus.
  • Attack Die Attack die can be overrated. Regardless of how many dice you throw per round, if the opponent gets a 6, then you lost your highest role attack. That’s why defense die is better than attack die. However, if your opponent doesn’t have defense die you are more likely to get multiple winning 6’s per round. When you are in a big battle, if in one of the rounds the enemy doesn’t get a 6, you can potentially get multiple 6’s, and kill multiple troops in that round. Two winning 6’s engage an attack that kills 4 troops of the opponent. Three winning 6’s engage an attack that wipes out the whole territory.
  • Guaranteed Card Many players don’t know how to benefit from having the guaranteed card. The way to maximize the earnings from having the guaranteed card is to look forward into getting other objectives when you acquire this objective card. While you keep getting stars or when you spread yourself too thin, use the turn to fortify and get a card anyways without losing any troops on the given turn. A common mistake that players do is that they do not invade on many continuous turns. This makes them loose a lot of troops per turn against other players, and can result negating the benefit of having the objective at all.
  • Additional Maneuver This is good to have, it basically helps you readdress any mistakes on your post attack stage when you have to defend different territories at once, but it also helps you to put many troops in one area to have it ready to attack on your next turn. It’s not as good as the starting maneuver, because during the game in many turns you will not need or have to use your second maneuver. However, having this and the starting maneuver, can be harder than the defense die itself on certain stages of the game.

Learn The Classic Map!

Use the knowledge of the map against your opponents.

Wolcen: Lords of Mayhem – Complete Aspect Guide (All Abilities, How to Unlock and Use)

Guide to Aspects

Introduction

Aspects in Wolcen: Lords of Mayhem is a special mechanic of the game that allows the player’s character to temporarily transform into a pristine being or apocalyptic form. There is a total of four Aspects that players can choose from, and each aspect contains its unique set of skills and abilities that can be executed on the battlefield and while you are in the chosen apocalyptic form. This guide covers a list of all the Aspects that are shown in the game.

How to Unlock an Aspect?

The first aspect can be unlocked near the end of Chapter 1, you’ll be given the opportunity to unlock and choose your first aspect, however, as you progress through the game, you can unlock other aspects and players can switch other aspects at any given time once you’ve obtained a new one.

Using an Aspect

In order to shift into your chosen aspect, you’ll have to collect and have enough Primordial Essence to fill its meter, and you can obtain this by killing monsters. Once it is full, press [R], and you’ll shift into your apocalyptic form, the meter will then begin to deplete over time and you’ll revert back to your original form once it’s empty. 

Wolcen: Lords of Mayhem Aspects

Aspect of Dawn

Commanding the battlefield as a beacon of blinding light, the Primordial of Dawn carries the hopes of humanity as she charges into the fallen hordes. With her essence infused into the First movement of Life, her believers stand steadfast, smiting all traces of corruption under her holy rays.

Aspect of War

Many of the Fallen indulge in the joys of destruction, but Baäpheth aims for something higher: strategy combined with skill in the service of absolute conquest. He splits the battlefield in twain with the flames of war, dispatching enemies in large swaths. All who stand in the way must fall before his violent ambitions.

Aspect of Infinity

The fabric of the world bends under his will, warping his enemies into cracks in space and time. The divine powers of Anulai-Tai were born from a need to fight existential power, and from that day he was the one to cast fear upon others, contorting the bodies of his opponents with gravitational shifts.

Aspect of Flesh

The Aberrant burgeons over all available earth, tendrils of skin and flesh blooming to assuage an all-consuming desire. His followers are endless, for in accepting Ashtaroth, their bodies become limitless weapons of bone and tendon. They lie in wait, preparing to assimilate the world in their image.

List of Aspect Abilities

Immaculate Score (Aspect of Dawn)

  • Powerful, purposeful attacks that deal Sacred damage.

Will of the Protector (Aspect of Dawn)

  • Invoke a wave of holy energy that pulls enemies towards you and deal a vicious hammer blow. Deals Sacred damage and generates Essence of Sanctity.

Hammer of the Aurora (Aspect of Dawn)

  • Launch your hammer into the fray, dealing damage upon landing and creating a vortex of purifying light that pulls enemies into its centre. Can be reactivated to create a powerful explosion. This ability deals Sacred damage and generates Essence of Sanctity.

All-Cleansing Light (Aspect of Dawn)

  • Summon a blessed aura around you, damaging enemies and giving allies additional Sacred damage for a short period of time.

Dawn Choir (Aspect of Dawn)

  • Launch yourself into the air and land at your cursor location, dealing Sacred damage around you. This ability consumes Essence of Sanctity to deal increased damage.

Frenzy Attacks (Aspect of War)

  • Attacks with an increased range that deal Fire damage. Attack speed increases with stacks of Frenzy.

Unflinching Assault (Aspect of War)

  • Slam the ground in a cone in front of you, dealing Fire damage. Each use of this skill generates a stack of Frenzy. The casting time of this skill is reduced with stacks of Frenzy.

Scorching Obelisk of War (Aspect of War)

  • Summon a powerful pillar of flame that deals Fire damage over time. This skill consumes all current stacks of Frenzy to deal increased damage.

Strife of Baäpheth (Aspect of War)

  • Unleash a blade of flame, dealing Fire damage in a long line. This skill can be charged; each stage increases damage and area of effect.

Charge of the First Warrior (Aspect of War)

  • Charge furiously towards the cursor location, dealing Fire damage in your wake. On arrival, deal damage around you in an explosion.

Biorhytmic Missiles (Aspect of Infinity)

  • Auto-targeting projectiles that deal Aether damage and generate points of Entropy.

Calamitous Paradox (Aspect of Infinity)

  • Launch a projectile of unstable existential energy that pierces enemies, dealing Aether damage. If the skill is reactivated or the projectile collides with your clone, the projectile explodes. This ability consumes Points of Entropy to deal increased damage.

Inevitable Obsolescence (Aspect of Infinity)

  • While channeling this skill, select targets to eradicate. After selecting a sufficient number of targets, fire out beams made from the fabric of time, dealing Aether damage and generating Points of Entropy.

Spatial Warp (Aspect of Infinity)

  • Tear a hole in time and space and obliterate all enemies in front of you with a huge beam of Aether damage. This skill increases in power and size over time.

Parallel Convergence (Aspect of Infinity)

  • Create a clone of yourself at the curser location which will copy your skills. Reactivating this skill allows you to swap position with your clone.

Boneblade Incisions (Aspect of Flesh)

  • Quick, wide boneblade slashes that deal Rend damage.

Bone Shuriken (Aspect of Flesh)

  • Leap backward and launch razor-sharp projectiles in a cone in front of you, dealing Rend damage. Killing enemies with any ability generates Aspects of  Blood, which are consumed to increase the number of projectiles and damage of this ability.

Eviscerating Flurry (Aspect of Flesh)

  • Launch into a series of extremely high-speed attacks in an area around your character, dealing Rend damage to all enemies inside it.

The Hungering Flesh (Aspect of Flesh)

  • Attack a single target by temporarily separating your being into 3 parts, ravaging them with Rend damage from all sides. This ability can be charged for increased damage.

Rapid Assimilation (Aspect of Flesh)

  • Dash through the bodies of your enemies, dealing Rend damage to those you pass through.

Wolcen: Lords of Mayhem – Complete Guide to Combat Mechanic

This guide explains how combat mechanics works in Wolcen: Lords of Mayhem.

All About Basic Combat Mechanic

Introduction

Combat for Wolcen: Lords of Mayhem focus on the basic combat mechanic of the game, and the associated actions that you can execute. Combat in Wolcen: Lords of Mayhem is similar to other ARPGS with the addition of unique elements.

Willpower and Rage

In Wolcen: Lords of Mayhem, the game’s combat system revolves around Willpower and Rage. Players will notice two resource bars that are on top of the Active Skills. The purple bar is the Willpower while the yellow bar is the Rage, these two are required to execute your active skills, however, they are different from one another. In order to fill up the Rage bar, you can attack enemies by using your equipped weapon, except for Staves/Catalysts and by activating a skill that uses Willpower. Using your Willpower resource will slowly fill up the Rage bar. On the other hand, building up the Willpower bar requires the player to attack enemies by using a Staff/Catalyst and spending the resources in the Rage bar will slowly convert or fill up the Willpower bar. Rage is required to activate attack-based skills, while Willpower is required to execute spell-based skills – depending on your skill modifiers, equipped gear, and unlocked passive skills, these factors modify the behavior of the Willpower and Rage such as its reduction, conversion, or regeneration rate.

Dodge Mechanic

On top of the Health/Force Shield bar, there are nodes that indicate the number of times you can dodge, this is the Stamina that is used to dodge. Players start off with four nodes, and eventually, as you progress through the game, it can be upgraded up to a maximum number of 8 nodes. Basically, one node is equivalent to one dodge, depending on the situation in battle, you can spam the dodge button if you wish to do so until you’ve consumed all nodes, just be mindful that once it’s all out, you’ll have to wait for a couple of seconds while it passively regenerates. As mentioned, you’ll be able to unlock more nodes as you progress through the game, or change its effects, like to reduce its time to regenerate by equipping gear that grants buffs and/or effects for dodging – to dodge, press the [SPACE] bar.

Combat Mechanic

Once players start the game, they’ll be given four slots for the Active Skills and eventually, as the player progresses through the game, two more slots can be unlocked which grants a total number of 6 Active Skills that can be equipped. The left mouse click, however, is permanently bound to execute basic attacks for whichever weapon the player has equipped, and again, as mentioned, basic attacks are used to generate either Willpower or Rage which is required to execute the Active Skills that are equipped.

Town Portal & Waypoint

If you need to return to Stormfall, you can use the Town Portal to travel back instead of opening your map and using a waypoint. Using a Town Portal will allow players to return back to the previous location, just make sure that you are in a safe spot and position since activating a Town Portal has a 4-5 second cast time. On the other hand, a Waypoint is considered a checkpoint that is usually found and unlocked for Fast Travel purposes. If you’ve unlocked a Waypoint, enter the World Map and click on the Waypoint you wish to go to and this will transport you to that location – using a Waypoint does not leave a portal.

Wolcen: Lords of Mayhem – Comprehensive Building List


In this guide you can find all buildings in Wolcen: Lords of Mayhem.

Guide to All Buildings

Introduction

Buildings in Wolcen: Lords of Mayhem is an endgame feature that highlights various structures that can be constructed in Stormfall, building a new structure allows a player to unlock new gameplay features such as a fifth skill slot, more personal stash tabs, the final Aspect of Apocalypse, and many more. This is part of the endgame mode: Champion of Stormfall – this page covers a full list of all the buildings that can be found in the game.

Buildings in-game interface

How to Unlock This Feature

Players can start various projects once the endgame mode: Champion of Stormfall has been unlocked, this can be obtained after completing all three acts of Wolcen’s campaign. Upon completing all three acts, the player’s character returns to Stormfall as a champion who is beloved by people and is also appointed as Regent by the noble house.

The Champion of Stormfall

As regent and champion, players will be given the task to manage the city of Stormfall, this will also give the opportunity to continue to strengthen abilities and stats of the player’s character by completing projects and participating in countless dungeons and expeditions. In order to start your duty, speak to Thunderblade Zalahir or press [ N ] to open the Stormfall Overview Screen

All Buildings in Wolcen: Lords of Mayhem

Stormfall Palace
Stormfall Palace has long been the home of Stormfall’s leaders. It is where the city’s council meet in order to table their concerns regarding Stormfall’s current state of affairs and to debate the merits of new initiatives before they are authorised by the head of state.

Stormfall Institute (West)
The Stormfall Institute was once home to the best and brightest minds that Stormfall had to offer. With the recent discovery of the primordial technology in Anankis, the work usually conducted by the Institute seems more pressing than ever. The West Wing has always focused on research into ancient power sources.

Stormfall Institute (Main)

The Main Exhibition was the Institute’s pride and joy, attracting scientists and researchers from all over the continent. When it was destroyed, many of the prized artifacts on display were ruined beyond recovery. However, with the discovery of Anankis, the Institute should have no shortage of curiosities to display to the public.

Stormfall Institute (East)

The Stormfall Institute was once home to the best and brightest minds that Stormfall had to offer. With the recent discovery of the primordial technology in Anankis, the work usually conducted by the Institute seems more pressing than ever. The East Wing has always been devoted to finding and researching ancient mechanisms from all over Wolcen.

The Cartographical Archives

In the past, the Cartographical Archives have been a symbol of Stormfall’s exploratory spirit. A vast library of maps, explorer’s journals, and tall tales, the Archives were the first port of call for anyone trying to decipher a treasure map or solve a mystery. In its prime, merchants from all over fought over its contents in auctions.

Seeker’s Garrison

The Seekers have been around since Stormfall’s inception. As an organization, they are devoted to exploring Wolcen’s wilderness and uncovering its hidden treasures. The garrison ensures that Seekers are at the peak of their physical conditioning, and trains them in the traversal of dangerous terrain.

Dark Market

The Dark Market is the perfect place for finding the most sought after equipment and materials in Wolcen, things that are not usually sold by the usual stock of merchants. Mohabi has cultivated relationships with the market’s members and is willing to curate equipment and materials on your behalf.

Anankis Artifact

After the discovery of Anankis, an ill-fated team was established to explore the Primordial megastructure. They returned a number of weeks later, survivors carrying a shrouded artifact. The nobles decided to bury it, afraid of the power humming from its surface…

Diamond Bank

The Diamond Bank serves as a replacement to Stormfall’s Central Bank, destroyed during the undead rising. A vault within has been designed for your own personal use.

Enneract Laboratory

Demetra’s research into enneracts has led her to understand them on a microscopic level. With the equipment in her new laboratory, Demetra now has the tools at her disposal to duplicate enneracts.

Energy Instillator

Demetra’s Energy Instillator serves the opposite purpose of her Siphon Chamber. Rather than extract magical energy, this device allows her to transfer energy from her stores into the body of a host. She is not incredibly keen on parting with it, but given your status, she is willing to trade it for gold.

Siphon Chamber

Demetra has a keen interest in the magical energies of Wolcen. Since meeting you, she has looked into ways of siphoning these energies from their sources. She has now mastered the process with her Siphon Chamber, and she is willing to trade gold for any surplus energy you may have.

Transmutation Forge

Demetra has perfected a technique that allows her to alter the shape and properties of any items or equipment. She has designed a forge tailored specifically to this task. She welcomes you to throw any unused equipment in the forge in the hopes that it may return something more attuned to your skill-set.

Stormfall Shipyard

Stormfall’s Shipyard has been the birthplace of some of the greatest ships to ever have graced the open seas. Before it ran into a state of disrepair, foreign dignitaries would visit and watch the shipwrights, marveling at the focus and precision of their work.

Stormfall Trade Assembly

The Trade Assembly serves as the main hub for distributing Stormfall’s exports and handling any diplomacy on the city’s behalf. The Assembly’s caravans once traveled to the farthest corners of the continent, and if they could so again, they would help usher in a new age of prosperity for Stormfall.

Salt Baths of Stormfall

Before it was buried, the Salt Baths were embedded in a rock face looking out to sea. The water for the baths was drawn from the sea, and many citizens believed that its waters held magical, re-vitalizing energy – they still do.

Refuge for the Blind

A vast, ornate temple, the Refuge of the Blind once served as a spiritual link between Stormfall and the Blind Monks of Morkaї. A small order of monks used to reside there, providing blessings to the people, blessings said to give the receiver the ability to find more wealth in all of their endeavors.

Disney’s Frozen 2: 8 Deleted Scenes From The Blu-ray Home Release

Mount & Blade 2: Bannerlord Finally Hits Early Access In March

It’ll be available on Steam, Epic Games Store, and the TaleWorlds website.

After a long wait and a period of silence, we finally know when we’ll be able to play Mount & Blade II: Bannerlord. The game, last seen at Gamescom 2018, will enter Early Access on March 31, developer Taleworlds has announced. This Early Access release window was promised back in August 2019, but it’s nice to have the date confirmed.
The game will cost $49.99/€49.99/£39.99.
<div class="js-video-player-new av-video-player av-desktop-player av-video-on-demand is-vid-uvpjs-player is-vid-autoplay is-vid-played is-vid-started is-vid-content-started is-vid-playing is-vid-hide-controls" data-id="1703961624" data-non-iframe-embed="1" data-promo-id="0" data-video="{"adCall":{"host":"http:\/\/pubads.g.doubleclick.net\/gampad\/ads?","params":{"iu":"\/8264\/vasia-gamespot\/desktop\/gamespot.com","impl":"s","gdfp_req":1,"env":"vp","output":"xml_vmap1","unviewed_position_start":1,"url":"[referrer_url]","correlator":"[timestamp]","cmsid":11409,"vid":6445798,"pp":"vpaid_js"},"custParams":{"ptype":"news_article","cid":"gs-1100-6473903","game":"mount-blade-ii-bannerlord","genre":"role-playing","con":"pc","publisher":"taleworlds","embed":"autoplay","franchise":"mount-blade","category":"games","partner":"desktop\/gamespot.com","vid":6445798},"soundBasedSize":{"normal":"640×480","muted":"640×483","none":"640×480"},"daiSsbUrl":"https:\/\/dai.google.com\/ondemand\/hls\/content\/2459129\/vid\/6445798\/master.m3u8","daiMidRollHost":2500176},"adPartner":"desktop\/gamespot.com","ageGateCookieName":"videoAgeGateBirthday","autoplay":true,"cms":"pi","countdownTime":0,"cuePoints":null,"datePublished":1535060520,"desktopAdPartner":"desktop%2Fgamespot.com","device":"other","guid":"gs-2300-6445798","id":6445798,"isDevice":false,"isLiveStream":false,"lengthSeconds":410,"mapp":"gamespot","mobileAdPartner":"mobile_web%2Fgamespot.com_mobile","partner":"gamespot","postPlayMax":100,"premium":false,"screenMediumThumb":"https:\/\/gamespot1.cbsistatic.com\/uploads\/screen_medium\/1574\/15746725\/3429276-gameplay_mountandblade_20180823_gs.jpg","seekablePlaybacks":["html5","uvpjs"],"share":{"linkUrl":"https:\/\/www.gamespot.com\/videos\/mount-and-blade-ii-bannerlords-archery-and-close-c\/2300-6445798\/","embedUrl":"https:\/\/www.gamespot.com\/videos\/embed\/6445798\/","embedHtml":{"640":"”,”480″:””}},”siteType”:”responsive web”,”startMuted”:false,”startTime”:0,”title”:”Mount%20%26%20Blade%20II%3A%20Bannerlord%27s%20Archery%20And%20Close%20Combat%20Gameplay”,”tracking”:[{“name”:”SiteCatalyst”,”category”:”qos”,”enabled”:true,”params”:[{“name”:”charSet”,”value”:”UTF-8″},{“name”:”currencyCode”,”value”:”USD”},{“name”:”siteType”,”value”:”responsive web”},{“name”:”trackingServer”,”value”:”om.cbsi.com”},{“name”:”visitorNamespace”,”value”:”cbsinteractive”},{“name”:”heartbeatTrackingServer”,”value”:”cbsinteractive.hb.omtrdc.net”},{“name”:”heartbeatVisitorMarketingCloudOrgId”,”value”:”10D31225525FF5790A490D4D@AdobeOrg”},{“name”:”partnerID”,”value”:”gamespot”},{“name”:”siteCode”,”value”:”gamespot”},{“name”:”brand”,”value”:”gamespot”},{“name”:”account”,”value”:”cbsigamespotsite”},{“name”:”edition”,”value”:”asia”}]},{“name”:”CNetTracking”,”category”:”tracking”,”enabled”:true,”params”:[{“name”:”host”,”value”:”https:\/\/dw.cbsi.com\/levt\/video\/e.gif?”},{“name”:”siteid”,”value”:”6″},{“name”:”adastid”,”value”:”597″},{“name”:”medastid”,”value”:”599″}]},{“name”:”ComScore_ss”,”category”:”qos”,”enabled”:true,”params”:[{“name”:”c2″,”value”:”3005086″},{“name”:”publishersSecret”,”value”:”2cb08ca4d095dd734a374dff8422c2e5″},{“name”:”c3″,”value”:””},{“name”:”partnerID”,”value”:”gamespot”},{“name”:”c4″,”value”:”gamespot”}]},{“name”:”NielsenTracking”,”category”:”tracking”,”enabled”:true,”params”:[{“name”:”host”,”value”:”https:\/\/secure-us.imrworldwide.com\/cgi-bin\/m?”},{“name”:”scCI”,”value”:”us-200330″},{“name”:”scC6″,”value”:”vc,c01″}]},{“name”:”MuxQOSPluginJS”,”category”:”qos”,”enabled”:true,”params”:[{“name”:”propertyKey”,”value”:”b7d6e48b7461a61cb6e863a62″}]}],”trackingAccount”:”cbsigamespotsite”,”trackingCookie”:”XCLGFbrowser”,”trackingPrimaryId”:”cbsigamespotsite”,”trackingSiteCode”:”gs”,”userId”:0,”uvpHi5Ima”:”https:\/\/s0.2mdn.net\/instream\/html5\/ima3.js”,”uvpc”:””,”videoAdMobilePartner”:”mobile_web%2Fgamespot.com_mobile”,”videoAdPartner”:”desktop%2Fgamespot.com”,”videoAssetSource”:”GameSpot”,”videoStreams”:{“adaptive_stream”:”https:\/\/gamespotvideo.cbsistatic.com\/vr\/2018\/08\/23\/Gameplay_MountAndBlade2_08232108_700,1000,1800,2500,3200,4000,8000,master.m3u8″,”adaptive_dash”:”https:\/\/gamespotvideo.cbsistatic.com\/vr\/2018\/08\/23\/Gameplay_MountAndBlade2_08232108_700,1000,1800,2500,3200,4000,8000,master.mpd”,”adaptive_hd”:”https:\/\/gamespotvideo.cbsistatic.com\/vr\/2018\/08\/23\/Gameplay_MountAndBlade2_08232108_8000,master.m3u8″,”adaptive_high”:”https:\/\/gamespotvideo.cbsistatic.com\/vr\/2018\/08\/23\/Gameplay_MountAndBlade2_08232108_2500,master.m3u8″,”adaptive_low”:”https:\/\/gamespotvideo.cbsistatic.com\/vr\/2018\/08\/23\/Gameplay_MountAndBlade2_08232108_700,master.m3u8″,”adaptive_restricted”:”https:\/\/gamespotvideo.cbsistatic.com\/vr\/2018\/08\/23\/Gameplay_MountAndBlade2_08232108_700,1000,1800,2500,master.m3u8″},”videoType”:”video-on-demand”,”watchedCookieDays”:1,”watchedCookieName”:”watchedVideoIds”}” style=”box-sizing: content-box; margin: 0px auto 20px; max-width: none; outline: 0px; overflow: hidden; padding: 0px; position: relative; user-select: none;” tabindex=”0″>

01:02 / 06:50

  1.  Auto
  2.  HD
  3.  High
  4.  Low
Report a problem

Mount & Blade II: Bannerlord will be released in Early Access on 31st March 2020. The game will be available for purchase through Steam, Epic Games Store, and TaleWorlds website, for $49.99/€49.99/£39.99.
View image on Twitter

822 people are talking about this

The sequel to Mount & Blade: Warband (which is actually, chronologically, a prequel) was first announced in 2016, so fans of the original (released in 2010) have been waiting a long time. Like its predecessor, this is an action-RPG with some strategy elements, that can be played alone in its campaign mode or online against other players.
It’s not yet clear how long the game will be in Early Access for, how complete this version of the game will be, or if any major content will be missing at launch.
March is shaping up to be a huge month for games; other games releasing during the month include Ori and the Will of the Wisps, Nioh 2, Animal Crossing: New Horizons, Doom Eternal, and Half-Life: Alyx.
Design a site like this with WordPress.com
Get started