Wolcen: Lords of Mayhem – Complete Overview Gate of Fates – GW
This guide will show all information about Gate of Fates (Passive Skill Tree) in detail.
Comprehensive Gate of Fates Guide
Outline
- Act I: Map Before Walk.
- Act II: The Rings Break Down: Inner Ring, the Red.
- Act III: The Rings Break Down: Inner Ring, the Green.
- Act IV: The Rings Break Down: Inner Ring, the Purple.
- Act V: The Rings Break Down: Middle Ring, the Red.
- Act VI: The Rings Break Down: Middle Ring, the Green.
- Act VII: The Rings Break Down: Middle Ring, the Purple.
- Act VIII: The Rings Break Down: Outer Ring, the Red.Â
- Act IX: The Rings Break Down: Outer Ring, the Green.
- Act X: The Rings Break Down: Outer Ring, the Purple.
Act I: Map Before Walk (Helicopter View of Gate of Fates)
- Old name in Early Access = PST (Passive Skill Tree)
- 3 rings (Inner / Middle / Outer)
- 3 colors (Red / Green / Purple)
- Non-linear (Flexible connection)
- Can Reset
In character sheet (press C) >> Reset passive. Not free (use primordial affinity [from Enneract sell]) - Same color = Same Shape (in each rings) except Plaguebringer in Outer ring.Â
- Inner ring = 3 colors & 3 groups (of nodes)
1 group (class) = 3 subgroup (Left / Middle / Right); 1 subgroup = 8 nodes (1 big + 7 small); 1 group = 3 x 8 = 24 nodes; Inner ring = 3 x 24 = 72 nodes - Middle ring = 3 colors but 6 groups (of nodes)
1 group(class) = 3 subgroup (Left / Middle / Right); 1 subgroup = 9 (Left / Right) or 12 nodes (Middle); (9 = 1 big + 1 Middle + 7 small / 12 = 1 big + 11 small); 1 group = (9 x 2) + 12 = 30 nodes; Middle ring = 6 x 30 = 180 nodes - Outer ring = 3 colors but 12 groups (of nodes)
1 group(class) = 3 subgroup (Left / Middle / Right); 1 subgroup = 5 (Left / Right) or 10 nodes (Middle); (5 = 1 big + 4 small / 10 = 1 big + 9 small); Except Plaguebringer = 12 nodes ( 1 big + 11 small); 1 group = (5 x 2) + 10 = 20 nodes; Outer ring = 12 x 30 = 240 nodes - Gate of Fates = 72 + 180 + 240 = 492 nodes
Act II: The Rings Break Down: Inner Ring, the RedÂ
Class: Soldier
- L1 Heavy Blows + 12% Melee weapon damage / + 12% Critical Hit damage
- L2 Heavy Blows + 12% Melee weapon damage / + 12% Critical Hit damage
- L3 Duntless +25 Ferocity
- L4 Zealous Might + 8% Attack damage / + 6% Critical Hit damage
- L5 Stylish Execution + 12% Critical Hit damage
- L6 Deadly + 18% Attack Critical Hit Chance Score
- L7 Supernatural Insight + 18% Spell Critical Hit Chance Score
- L8 The Wild Card + 60% Critical Hit Chance Score (Attack & Spell)
- M1 Quick Draw + 10% Cooldown Reduction for all skills
- M2 Zealous Might + 8% Attack damage / + 6% Critical Hit damage
- M3 Pain Resistance Program + 12% All Resistance Score / + 8% Maximum Health
- M4 Celerity + 6% Move speed
- M5 Tenacious + 3s Rage conservation time
- M6 Disciplined + 8% Rage cost Reduction
- M7 The Heat of Battle + 25 Rage Per Hit taken
- M8 Disciplined + 8% Rage cost Reduction
- R1 Capable + 10% Maximum Health / + 4% Rage cost Reduction / + 4% Willpower cost Reduction
- R2 Capable + 10% Maximum Health / + 4% Rage cost Reduction / + 4% Willpower cost Reduction
- R3 Unyielding + 25 Toughness
- R4 Pain Resistance Program + 12% All Resistance Score / + 8% Maximum Health
- R5 Stalwart + 12% to All Resistance Score / + 12% Health regeneration
- R6 Enduring + 10% Maximum Health / + 12% Health regeneration
- R7 Chemically EmpoweRed Skin + 12% Status Ailment Resistance Score / + 12% Health regeneration
- R8 Second Wind when Under 30% of Max Health, gain BURST of Health regeneration
Act III: The Rings Break Down: Inner Ring, the GreenÂ
Class: Sentinel
- L1 Refined Technique + 15% all Projectiles damage / + 15% Melee weapon damage
- L2 Refined Technique + 15% all Projectiles damage / + 15% Melee weapon damage
- L3 Nimble + 25 Agility
- L4 Precise Strikes + 8% Attack damage / + 9% Critical Hit Chance Score
- L5 Celerity + 6% Move speed
- L6 Quick-Minded + 18% Spell casting speed Score
- L7 Blitz Fighting + 18% Attack speed Score
- L8 Backline Raider + 50% Attack speed Score / + 50% Spell Casting speed Score
- M1 Quick Draw + 10% Cooldown Reduction for all skills
- M2 Precise Strikes + 8% Attack damage / + 9% Critical Hit Chance Score
- M3 Slippery + 1 Stamina point
- M4 Chemically Empowered Skin + 12% Status Ailment Resistance Score / + 12% Health regeneration
- M5 Endurance Training + 15% Stamina regeneration rate Reduction
- M6 Calculated Skirmish + 20% damage when at Full Stamina
- M7 Pinch Runner gain +3 Stamina point when at 30% of Max Health or lower
- M8 High Adrenaline + 4% damage per Missing Stamina point
- R1 Resilient + 10% Maximum Health / + 8% Force shield
- R2 Resilient + 10% Maximum Health / + 8% Force shield
- R3 Unyielding + 25 Toughness
- R4 Chemically Empowered Metabolism + 10% Maximum Health / + 12% Health regeneration
- R5 Enduring + 12% Dodge Chance Score / + 9% to All Resistance Score
- R6 Evasive Manoeuvers + 12% Dodge Chance Score / + 8% Force shield
- R7 Flexible + 12% Dodge Chance Score / + 8% Maximum Health
- R8 Covert Operative + 100% Dodge Chance Score after taking a Hit
Act IV: The Rings Break Down: Inner Ring, the PurpleÂ
Class: Scholar
- L1 Heightened Concentration + 12% Spell damage / + 12% Ailment damage
- L2 Heightened Concentration + 12% Spell damage / + 12% Ailment damage
- L3 Determined + 25 Wisdom
- L4 Adept + 12% Spell Casting speed Score / + 8% damage
- L5 Anatomical Expert + 25% Material Status Ailment Chance Score
- L6 Physician + 25% Elemental Status Ailment Chance Score
- L7 Witchcraft Consultant + 25% Occult Status Ailment Chance Score
- L8 Attrition Strategist + 60% Ailment Chance Score
- M1 Quick Draw + 10% Cooldown Reduction for all skills
- M2 Adept + 12% Spell casting speed Score / + 8% damage
- M3 Emotional Intelligence + 150 Max Willpower & Rage
- M4 Steadfast + 5% Rage cost Reduction / + 5% Willpower cost Reduction / + 9% to All Resistance Score
- M5 Increased Awareness + 15 Range for picking up Health Globe
- M6 Unwavering Dedication + 10% Healing from Health Globe
- M7 Thirst For Knowledge + 25% Force shield recharge from Health Globe
- M8 Unwavering Dedication + 10% Healing from Health Globe
- R1 Hardy + 10% Force shield / + 12% Status Ailment Resistance Score
- R2 Hardy + 10% Force shield / + 12% Status Ailment Resistance Score
- R3 Unyielding + 25 Toughness
- R4 Steadfast + 5% Rage cost Reduction / + 5% Willpower cost Reduction / + 9% to All Resistance Score
- R5 Purifier’s Will + 30% Damage Reduction when Force shield is Full
- R6 Propaganda Fueled Zeal + 20% Force shield regeneration Delay Reduction
- R7 Heroic Resolve + 17% Force shield regeneration rate / + 10% Force shield regeneration DELAY RedUCTION
- R8 Chemically Empowered Brain + 25% Force shield regeneration rate
Act V: The Rings Break Down: Middle Ring, the RedÂ
Class:Â WarmongerÂ
- L1 God Amongst Men + 50% Material damage & can only deal Material damage
- L2 Mystic Potential + 30% Aether damage converted into Physical damage + 30% Sacred damage converted into Physical damage + 30% Shadow damage converted into Physical damage
- L3 Primal Power + 30% Fire damage converted into Physical damage + 30% Frost damage converted into Physical damage + 30% Lightning damage converted into Physical damage
- L4 Cruelty + 15% Material damage
- L5 Marked Flesh + 100 Maximum Health + 8% Maximum Health
- L6 Battlefield Predator + 1% Damage for each nearby Enemy
- L7 Bestial Frenzy + 4% Damage for each nearby Enemy within 4 m Range
- L8 Take All Challenger 2 m Range for enemies to be consideRed nearby
- L9 Blood Rush + 10% Maximum Health + 12% Health regeneration
- M1 Master Of Frontline + 8% Melee weapon damage + 6% Attack damage
- M2 Unleash Power + 10% Attack damage
- M3 Unleash Power + 16% Attack damage
- M4 Unleash Power + 10% Attack damage
- M5 Brutality + 25 Ferocity
- M6 Whirlwind Of Steel + 10% Melee weapon damage
- M7 Whirlwind Of Steel + 16% Melee weapon damage
- M8 Whirlwind Of Steel + 10% Melee weapon damage
- M9 Strike Like Lightning + 5% Movespeed / + 5% Attack speed Score / + 9% Spell Casting speed Score
- M10 Tearer Of Flesh + 2% Life Leech from Attack damage
- M11 Feast For The Crows + 2% global Life Leech
- M12 Blood Offering + 2% Life Leech from Spell damage
- R1 Blood Reaper + 50% Physical damage converted into Rend damage
- R2 Shredder + 15% Bleed Chance Score on Rend damage
- R3 Cannibalistic Savagery + 4% Life Leech on bleeding target
- R4 Swiftness + 15% Attack speed Score
- R5 Impervious + 5 to All Resistance Score / + 12% All Resistance Score
- R6 Appetite For Bloodshred + 35 Rage generation on kill
- R7 Manic Slaughter + 2% Damage per 100 unspent Rage points
- R8 Unbridled Rage + 10% Rage Per Hit taken
- R9 Deadly Physicality + 10% Material damage / + 10% Attack speed Score
Class: PraetorianÂ
- L1 Selfless Courage + 25% All Resistance Score for You & your Allies after blocking a Hit
- L2 Perfect Defense + 20% Block efficiency
- L3 None Shall Pass + 5% Block Chance
- L4 Mighty + 12% Attack damage
- L5 Immortal Blood + 25% Health regeneration
- L6 Rightful Vengeance + 0.25% Damage per percent of Physical Resistance
- L7 Retaliator + 0.75% Damage per percent of Physical Resistance / + 50% Critical Hit Chance
- L8 Rightful Vengeance + 0.25% Damage per percent of Physical Resistance
- L9 Perseverance + 12% Health regeneration / + 10% Health regeneration rate
- M1 Impervious Wall + 12% to All Resistance Score / + 8% Maximum Health
- M2 Iron Skin + 18% to All Resistance Score
- M3 Iron Skin + 18% to All Resistance Score
- M4 Iron Skin + 18% to All Resistance Score
- M5 Brutality + 25 Ferocity
- M6 Robust + 15% Maximum Health
- M7 Robust + 15% Maximum Health
- M8 Robust + 15% Maximum Health
- M9 Strike Like Lightning + 5% Movespeed / + 5% Attack speed Score / + 9% Spell Casting speed Score
- M10 Regal Blessing + 20% Block efficiency
- M11 Kingless Aegis + 6% added Block Chance and allow any weapon to block
- M12 Unorthodox Technique + 3% added Block Chance and allow any weapon to block
- R1 Blessed Manna + 40% All Resistance Score for You & your Allies after picking up a Health Globe
- R2 Divine Alms + 10% Healing from Health Globe
- R3 Holy Gift + 4% Health Globe generation
- R4 Weak Spot Focus + 12% Critical Hit damage
- R5 Regenerative Body + 20% Health regeneration rate
- R6 Faith Of The Kingless + 1 Weakness stack inflicted on block
- R7 Sacred Oath Apply 2 Weakness stack inflicted upon blocking an Attack to the target in 7 m RADIUS
- R8 Laibonite Discipline + 5% Block Chance
- R9 One Man Crusade + 12% Attack damage / + 12% Critical Hit damage
Wolcen: Lords of Mayhem – 100% Achievement Guide – GW
100% Achievement guide with some helpful tips for completion.
Introduction
Just to preface things, there will be slight spoilers for the game in case you want to stop here and finish your first run blind. It’s also possible to load someone else’s save game with a max level character in offline mode which may or may not trigger the endgame achievements (idk if it works) and since that’s not really a ‘legit’ way to earn all the achievements the method wont be covered here.
As I finish all the achievements i’ll add some more tips to the endgame side of things, but the majority of everything is already here.
Secret Bosses
This section is first since these are the easiest achievements to miss in a casual playthrough of the game. There are three ‘secret’ bosses in the game, one for each Act and thankfully none of them are in any of the side dungeons so you will never need to go down the green stairs if you don’t want to.
As with anything in the story mode, play it on story difficulty if you’re having problems with the boss. There is also no way to go back to prior acts once you have completed them and moved on, so you’ll have to tag these on a new character if you missed them the first time.
Vaultmarcher Regicide
Defeat Queen Amadalah in battle.
The first secret boss is a unique bug boss that can be found in the top right corner of the map with the waypoint named “Farmlands” at the begining of the Svir section in Act 1.
Shoot the Caster First
Defeat Mistshaper Malikia in battle.
The second secret boss is a unique necromancer boss that can be found right around the corner from the begining of the Helmshire map immediately following the first time you meet Gernese. (Waypoint name upcoming).
Living Ram
The final secret boss is Big Bertha and she is found right around the corner from the waypoint named “Cell H” at the end of the battlefield section of Act 3.
Main Story Line
Pomp and Circumstance
Defeat the Justicar in battle.
The Act 1 final boss is the first real heart to heart where you can find out that your build is actually just not good enough to keep going through the game. This boss SHOULD be really easy to beat, even on normal difficulty at level 20, so if it feels like you need to play absolutely perfectly in order to beat him then you either need to respec your character or start a new one.
Trust me, the first time i played the campaign i got stuck on this boss and couldnt beat him after 10ish tries until the multiplayer servers went down and i had to make another character who ended up beating him on the very first try. Its very easy to make a build that does not scale well, If you are making a warrior focus on the Bladestorm skill. Rogues should focus on the arrow rain and turret skills. If you dont want to struggle at all just turn on the story mode difficulty from the main menu.
Children’s Trial
Complete the first act.
Closer to Genesis
Loot your first legendary item.
Sins of the Flesh
Defeat Lambach in battle.
You’ll earn this achievement due to the quest reward at the end of act 1.
The triangle in the center of his invulnerable phase is constantly covered in damage stuff so pick one side of the map and stay on it while avoiding tentacles. Once again if it takes more than a couple of runs at level 30 to learn its mechanics and you still havent beat it then its very likely you just need a better build.
Aberration Purified
Complete the second act.
Proven Initiate
Reach level 30.
Senseless Relapse
Defeat the Final Boss of Act 3.
To me this has always been the easiest of the three act bosses. The only real tip i can give is to stay away from the orbs in the corner of the room because they periodically explode and do bad things to your character. Stand on the walkways in between the orbs so that you can ignore that mechanic, and don’t even try dodging through the purple stuff, just run the other way kiting the boss around the triangle.You should be able to beat this boss at level 39.
Into the Fury
Complete the third act.
Hardcore Achievements
Sink or Swim
Complete the first act without dying.
There are two main tips for beating the campaign without dying.
First, if you play alone (both online and offline) the game with give you 3 “second winds” in order to get up before it registers as a death. With this in mind, if you get to the second or third knockout and you dont feel like you can win, just hit the menu button and exit the game. If you want your second winds to refresh back up to 3 charges in the same game session just exit to main menu and then return to the game.
If you are really having problems with hardcore more, get to a high level with a character you dont mind dying with in order to farm some good gems then come back to slot them into some low level socketed weapons and just watch everything melt around you. The personal stash is shared amond all characters so you can also front load a bunch of money and eneracts to new characters by just filling a stash tab with throw away items for them to sell or use.
Hard Earned Allies
Complete acts one and two without dying.
Trial By Fire
Complete acts one, two, and three without dying.
Whispers in the Concordat
Reach level 30 without dying.
Nightmares in the Republic
Reach level 60 without dying.
Monolithic Myth
Reach level 90 without dying.
Once you get to endgame the three charges of second wind start reseting every time you enter a new ‘turn’ so you no longer have to worry about exiting and returning to a play session in order to reset your revive counter. My one word of caution is to stop playing greedily. The game encourages you to try and push your luck due to the turn system but the journey to 90 on a hardcore character is such a long term goal that you have to just learn to push down that temptation and quit on the second or third knockout no matter how close you are to a map clear.
Intro to Endgame
Constructing a new building occurs whenever you complete the first upgrade in each hexagonal menu, just in case that needs clarifying.
As of February17, 2020 this achievement is bugged so if you build ANY of the named buildings it will trigger the achievement. Even if its fixed by the time you get to this point you should be trying to build these upgrades as soon as possible since they apply to any characters in that game mode. For example, if you build the merchant bonuses building in offline mode, all offline characters from lvl 1 and up will all receive the 10% sell bonus / 20% buy bonus.
I think that missions refer to either expeditions or bounties but this needs more testing.
In order to unlock higher level expeditions you need to complete all three levels of an expedition on a single run without failing, this will unlock the next level bracket, IE 40-42, 43-45, or 46-48
You should earn your first map by the time you reach lvl 50. Place it in the slot on an expedition to activate unique conditions for that level. Usually only works for one level instead of the three that expeditions normally have.
Build the labratory building and then the option should be available at the eneract merchant
Build and upgrade the vaults building.
Road to Lvl100
You’re gonna grind the endgame missions, over and over and over. I’ll have more to say once I find a way to complete this grind since i’ve been focusing on hardcore characters. Good luck.
Miscellaneous
Sarisel mode is activated by placing four modifications on an expedition in end game and then clicking on the sarisel mode. The mode ranks you at the end of a floor based on how many things you killed, how often you died, and how long it took you. Needs more testing since I didnt recieve this achievement after an S rank.
Currently seems to be bugged? I dyed one block in every armor piece and the achievement still didnt activate as of Feb 17, 2020
Press B for the default hot key to enter the transmog menu.
New forms seem to be awarded based on level? I’ve always gotten three by the time i unlock end game, but i dont know what triggers the fourth unlock.
TBD when i figure out what the final gem rank is.
Dominions 5 – How to Pretender, Bless, and Thug Design – GW
This is a quick and dirty guide on building your pretender, your bless, and your thugs, by giving a general overview and a list of good options available.
Guide to Building Pretender, Bless, and Thugs
Introduction
Dominions 5 is a very complex game. Unless you have a solid understanding of the game mechanics, it can be hard to make good choices when designing your nation and its units, and the sheer amount of options available can be downright intimidating to a new player. There are detailed guides out there, that go deep into the mathematics behind the game. That’s not what this guide is for. This guide is intended to be a concise overview of some of the more complicated parts of the game, and suggestions of things to consider when customizing your nation.
Pretender Body
After you pick your nation, the first thing you’ll pick is your pretender’s body. There are 4 archetypes, going by base dominion score:
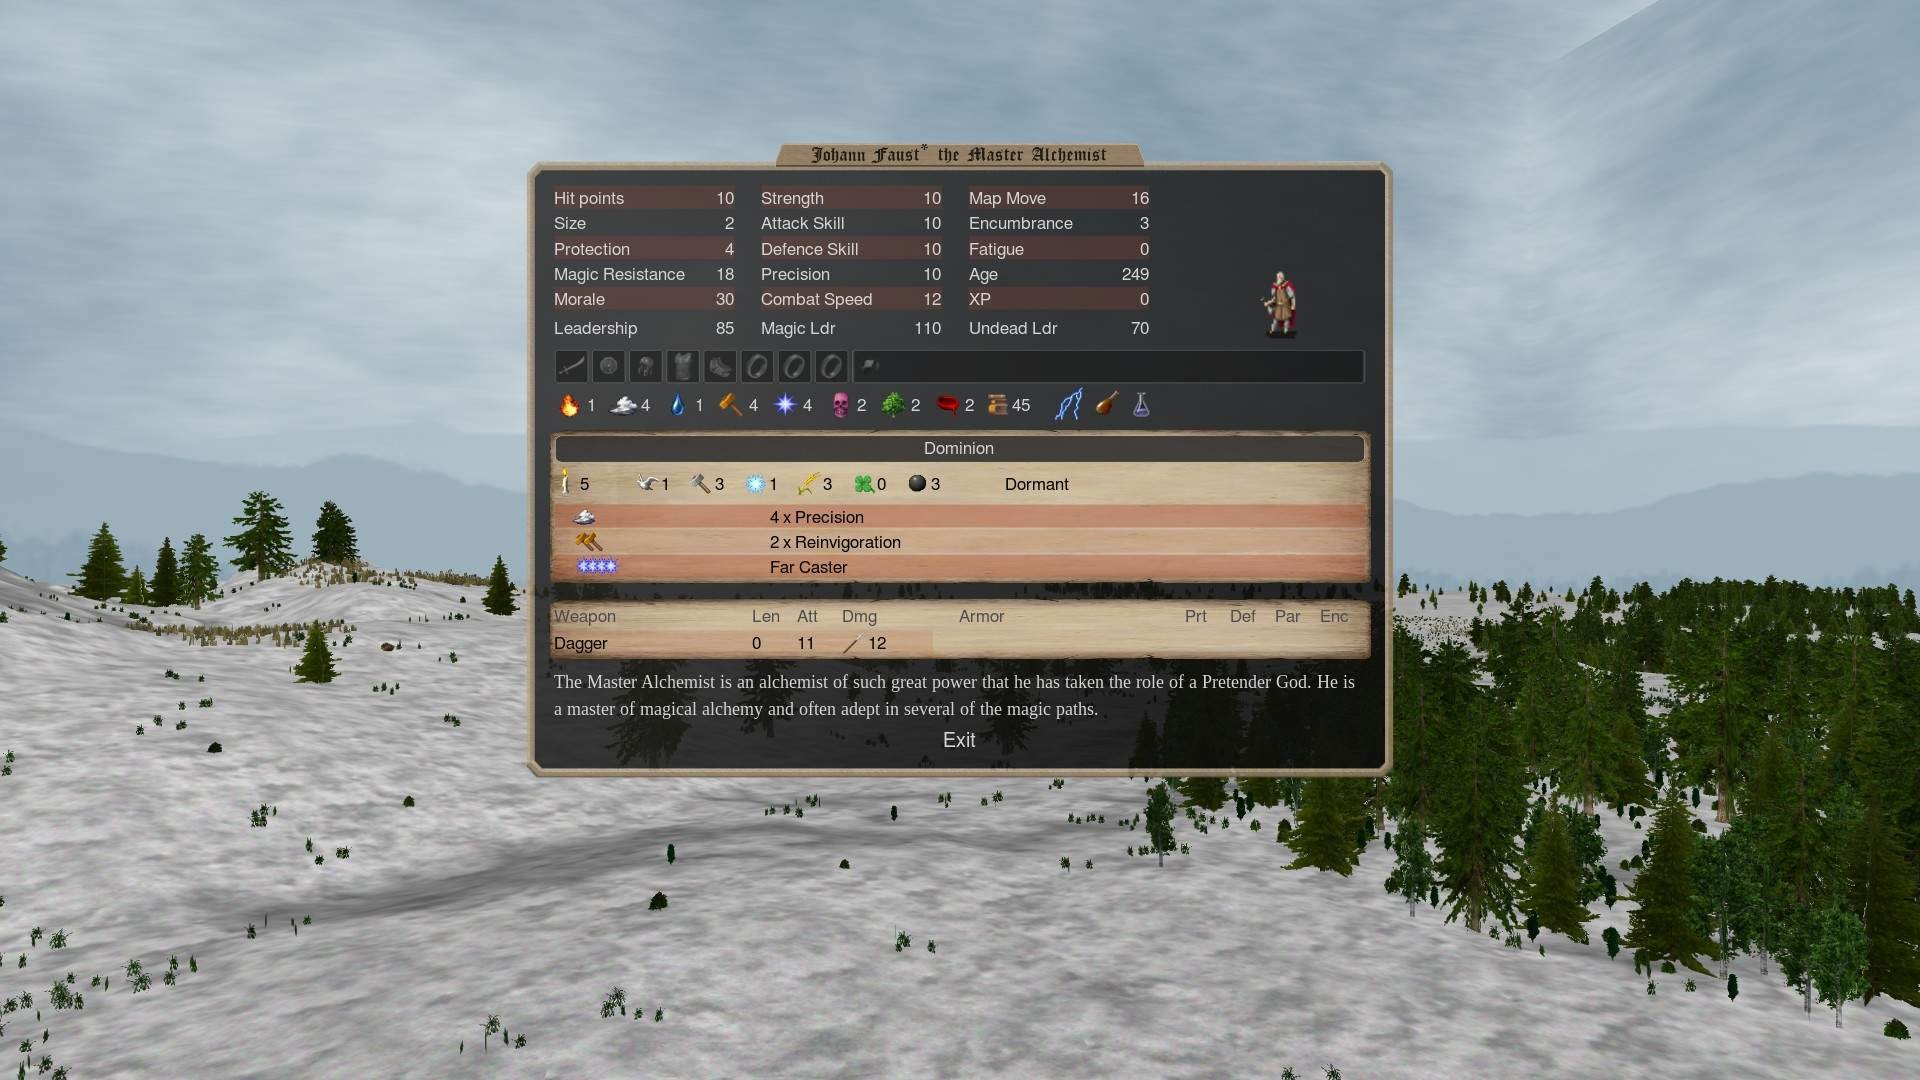
Dominion 1: “Rainbow Mages”
So named for their colorful magic skill icons. These are dirt cheap mortal bodies that are too fragile for combat, but are able to take a wide variety of magic paths. This lets nations that normally only have access to a few schools of magic branch out into other types that they don’t normally have access to. They’re also a good way to get both good scales and a cheap bless (put 3 points in either fire/water/earth/air or astral/nature/death/blood).
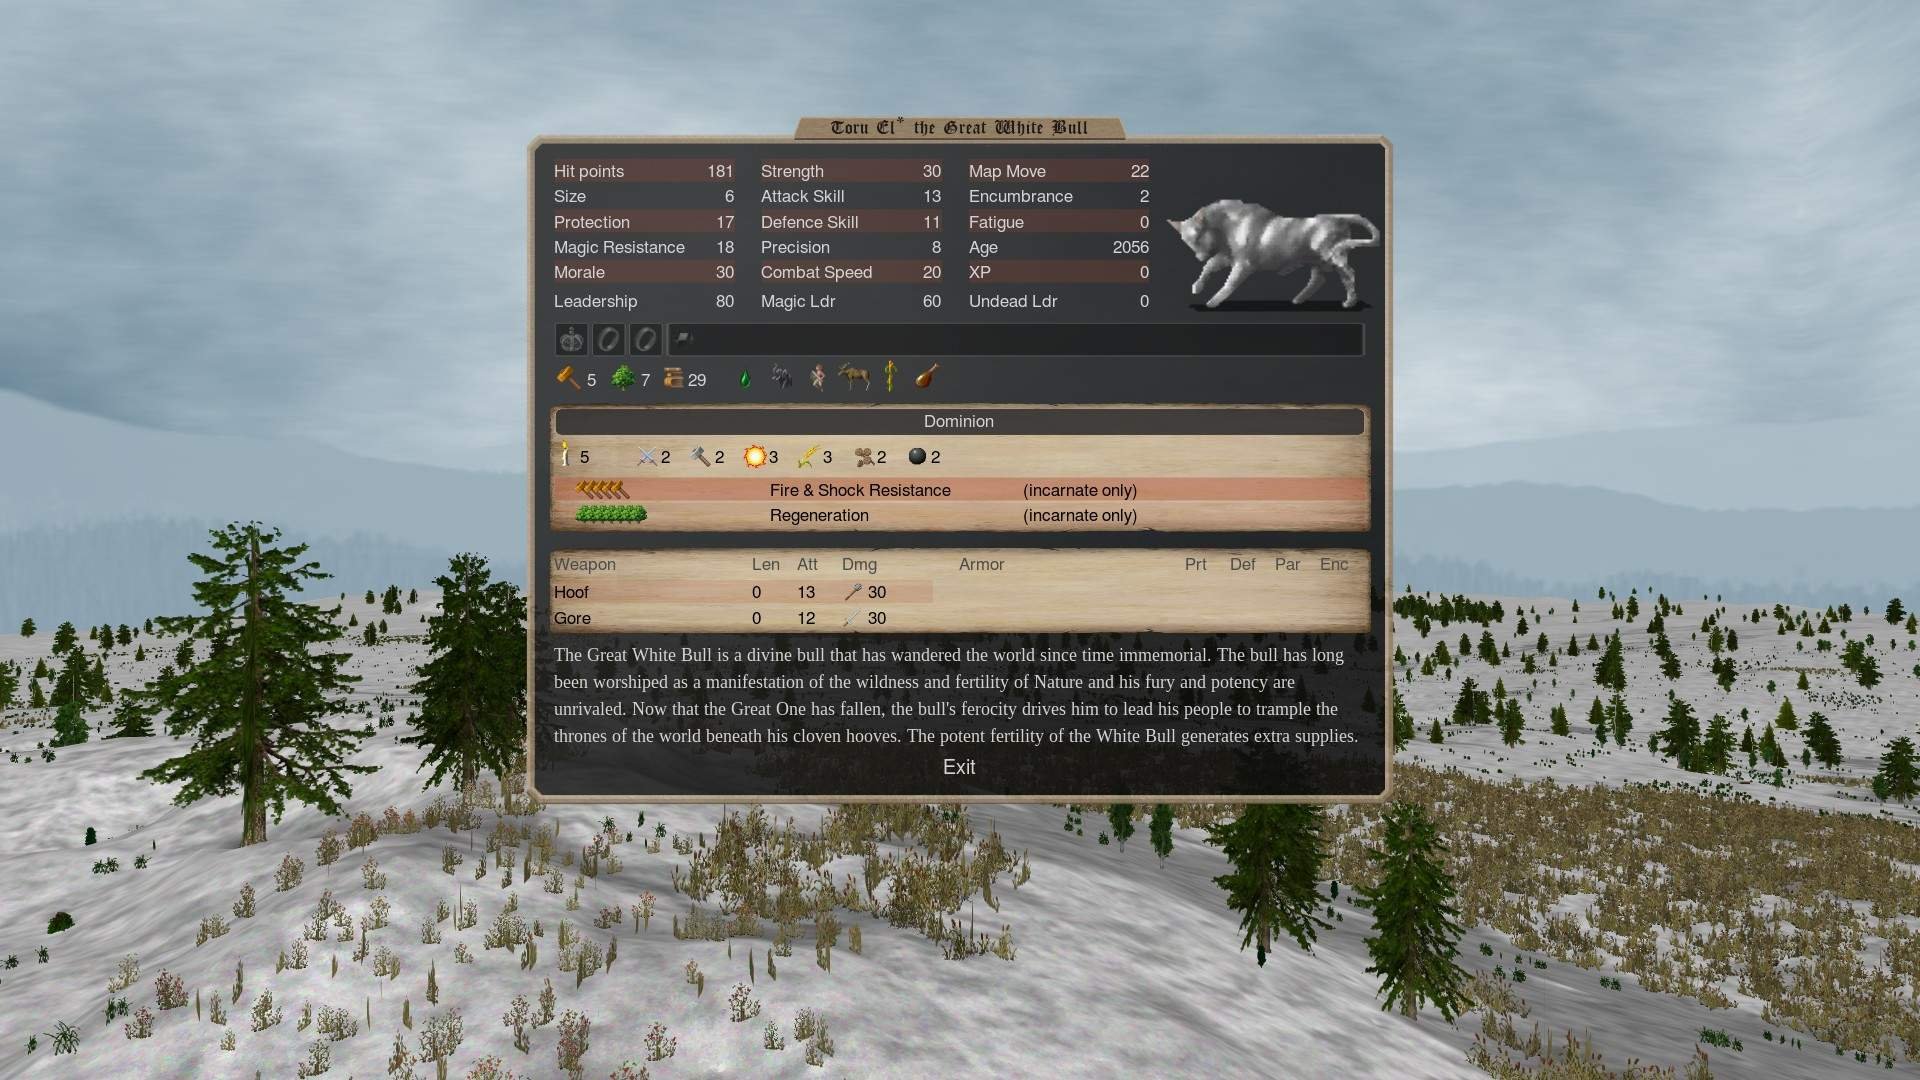
Dominion 2: “Awake Expanders”
These guys are huge monsters with high natural protection and multiple attacks, making them powerful thugs from turn 1 and are almost always taken awake. They exist to help you expand your territory against NPCs in year 1 and help you fight early wars against other players in year 2 or 3. They lack the ability to wear most forms of equipment, so they fall off in effectiveness by the mid game. Take an awake expander if you have trouble conquering independents (aim to have at least 10 provinces by turn 12); or, take one if you just want to be super aggressive and grab as much land as possible and start early wars. For extra aggressiveness, take one with an incarnate bless to try to snowball to victory off a powerful early game. Beware, if you’re involved in an early war, pretender gods are much weaker in enemy dominion, and rushing an enemy’s capital with one is risky.
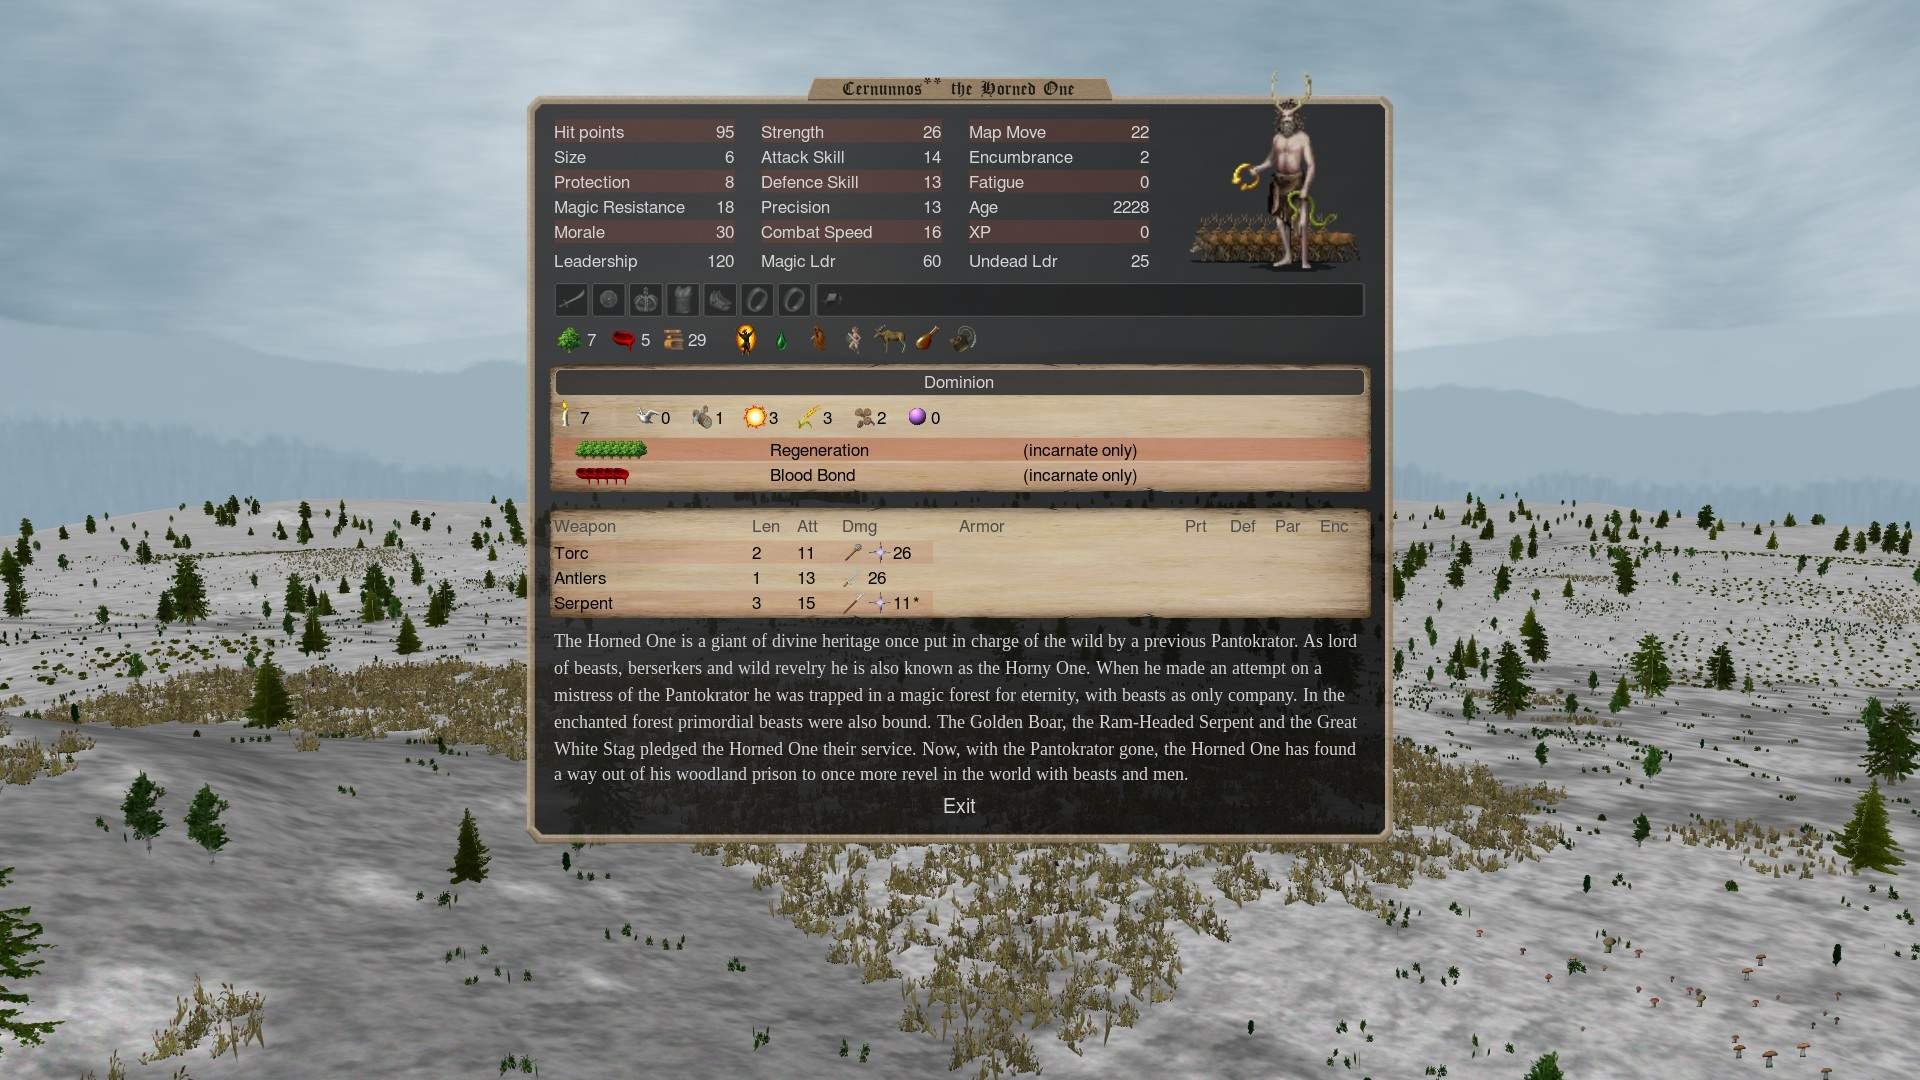
Dominion 3: “Titans”
Despite being giants, these guys are usually too weak to help you expand year 1 because most of them start out with unimpressive equipment and low natural protection. Sometimes they can do it, especially if you can quickly forge them some basic gear, but their main advantage comes in the mid/late game, not the early game. They have good magic access in 2 or 3 paths and they have a variety of equipment slots, which means that they make extremely powerful units when kitted out fully, and around construction 4 you can expect them to become more powerful than Dominion 2 monsters.
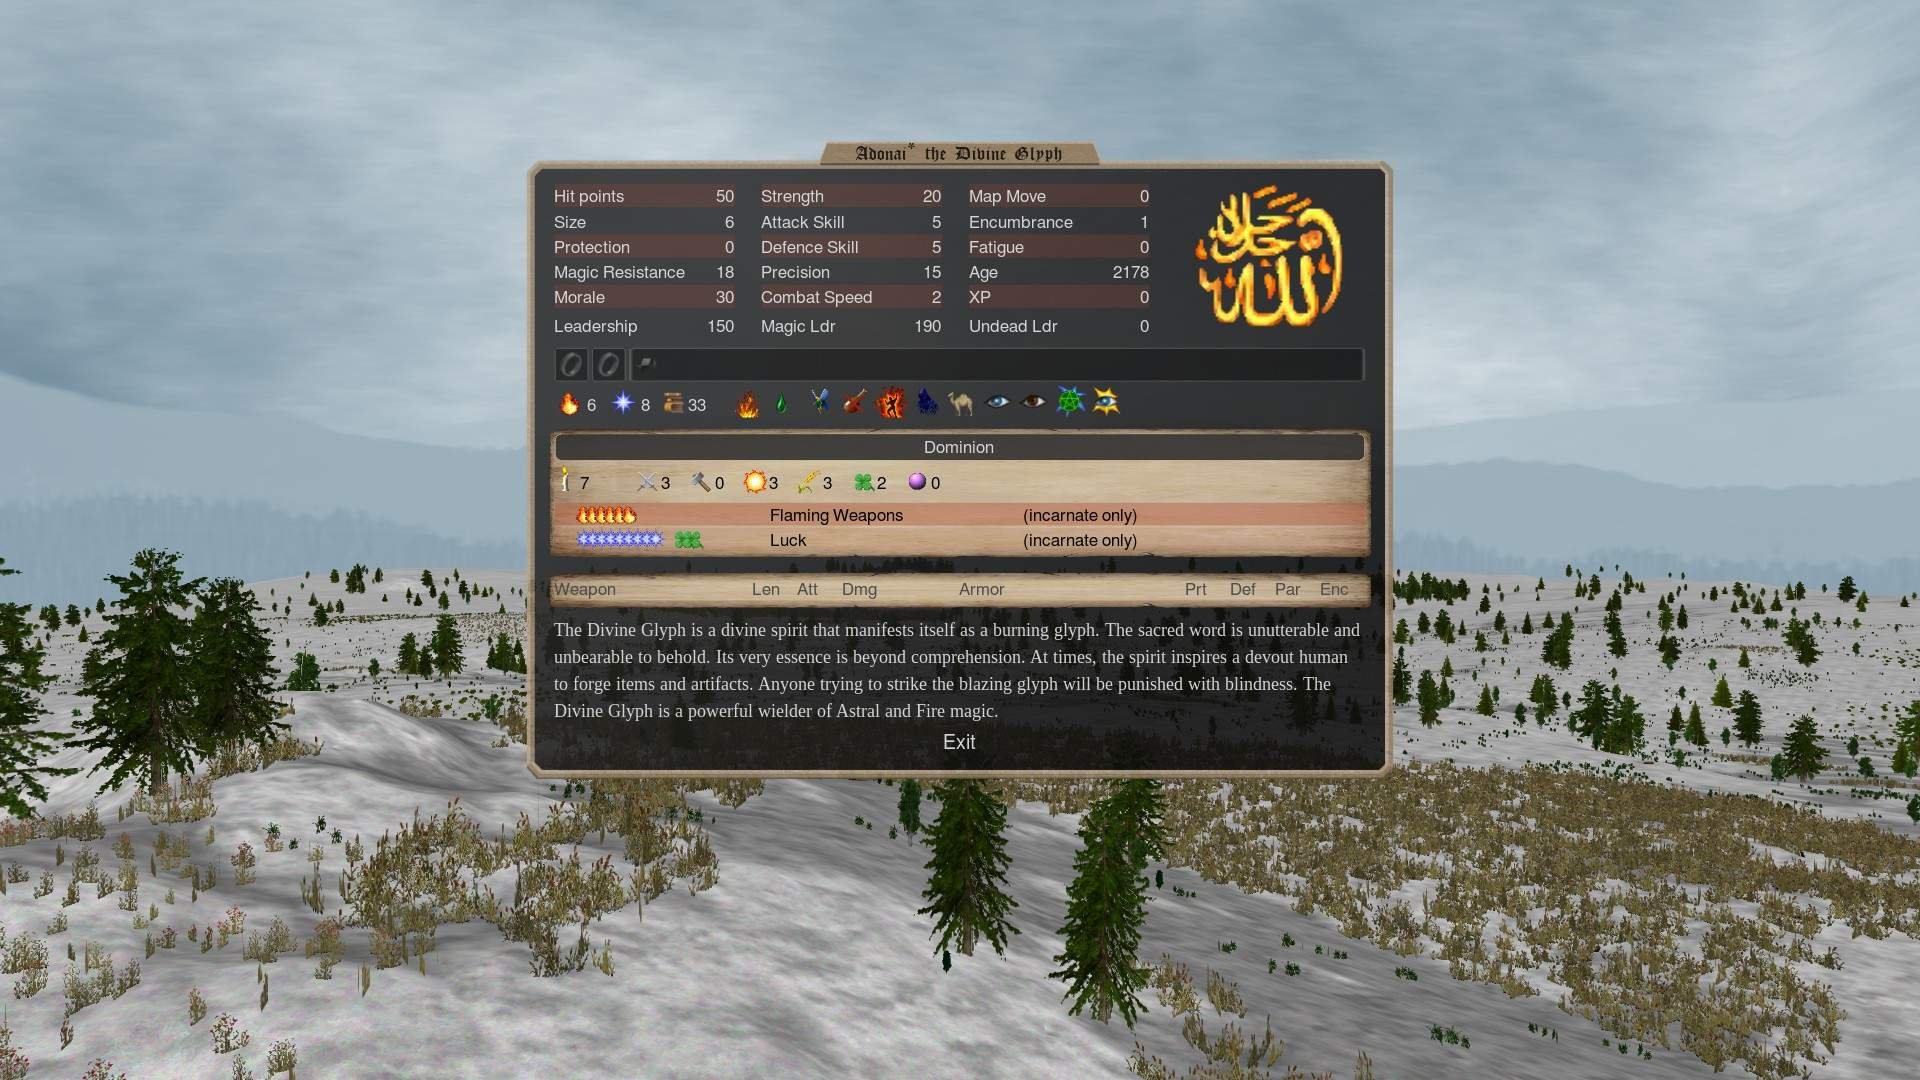
Dominion 4: “Immobiles”
These are super cheap bodies with strong magic in 2 or 3 paths, but can’t leave their province except through magic (requiring a laboratory). They are also usually quite durable, but can usually only be used in a defensive role. Their main use is to be a stat stick for a good bless or good scales.
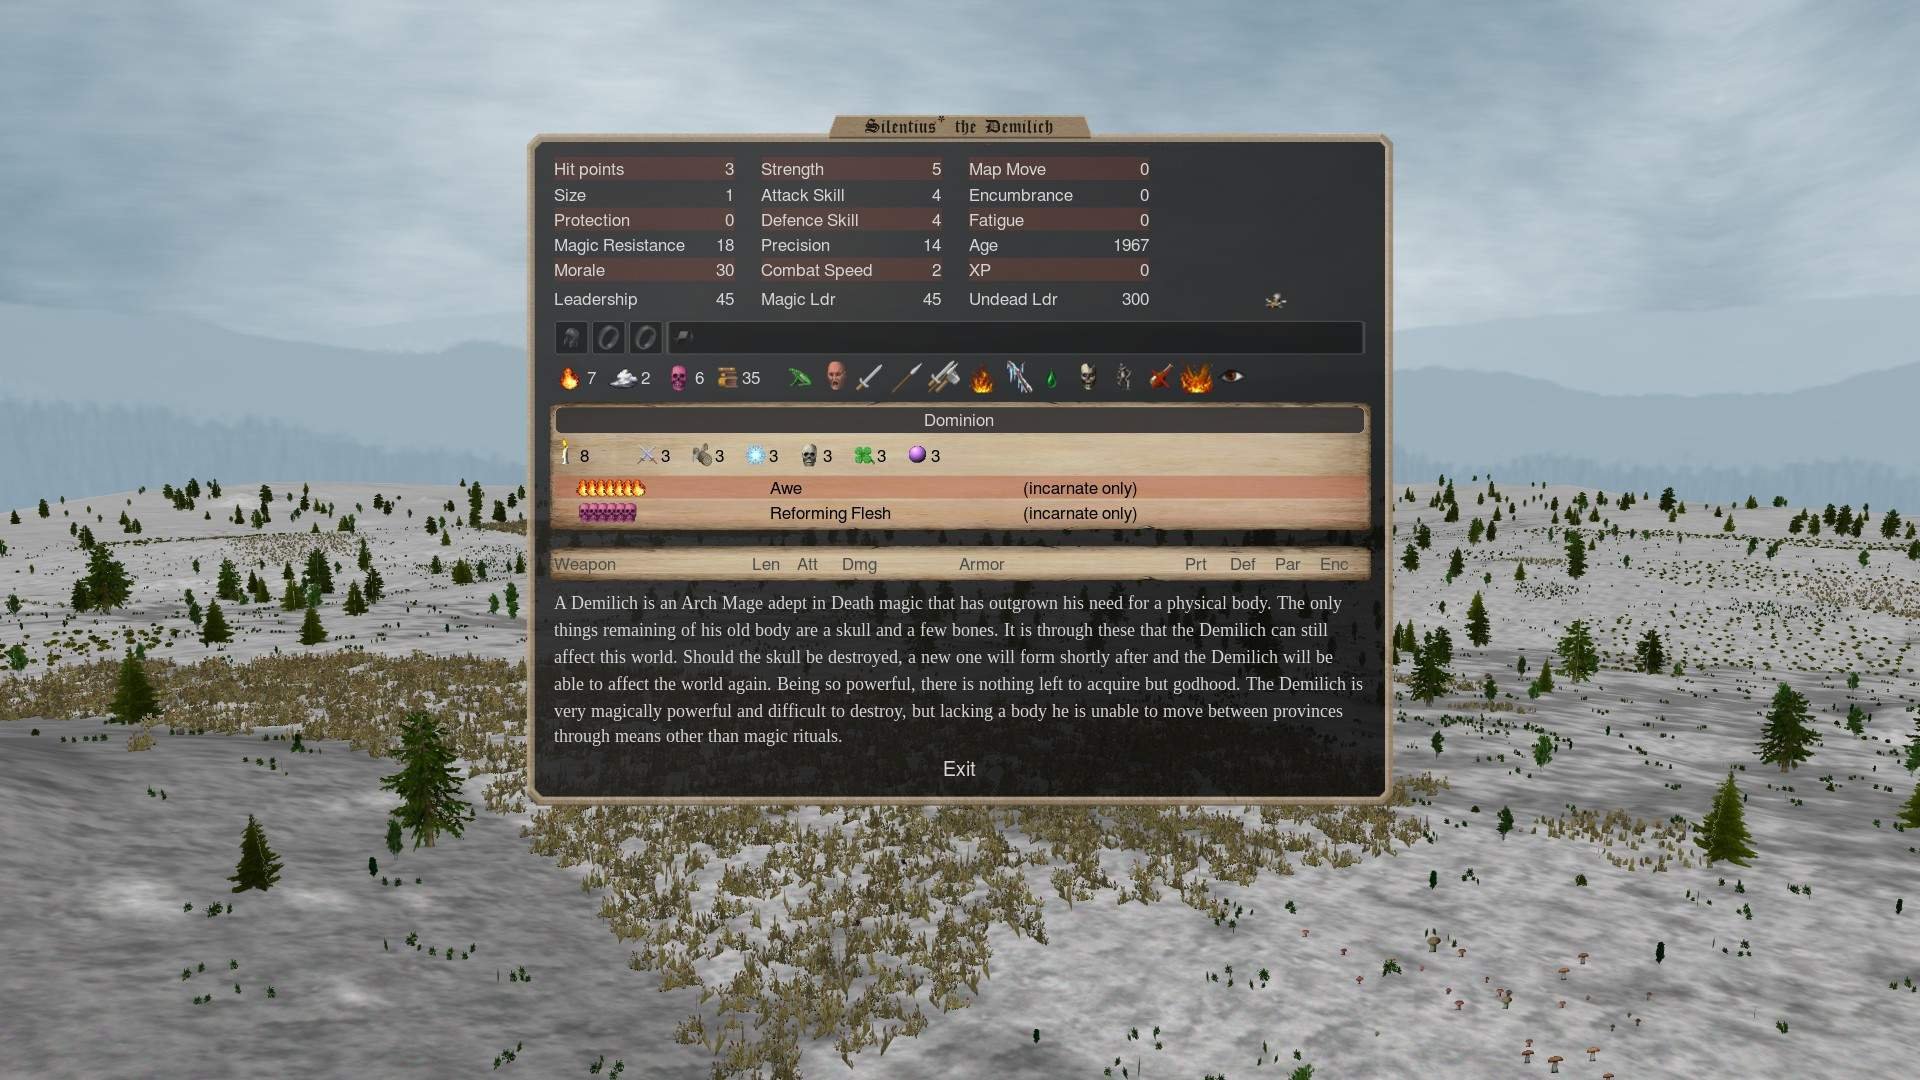
Hybrids
There are also a few oddballs like the Demilich, the Virtue and the Ghost King (and many more) who don’t quite fit into any of the above categories. These pretenders are more versatile, but also have their own drawbacks as well. The Demilich is a hybrid between a Rainbow Mage and an Immobile, it has good magic access but lacks the durability of other immobiles. The Virtue is a hybrid between an Awake Expander and a Titan, it has a variety of built-in abilities that let it expand turn 1, and it has a full array of equipment slots, but it is much smaller and weaker than a true Titan. The Ghost King is a hybrid between a Rainbow Mage and an Awake Expander, it can branch into other paths and can help with expansion, but is more expensive than a Rainbow and is worse at expansion than a dedicated Awake Expander. So be aware that there are exceptions to the 4 archetypes outlined above.
Awake, Dormant or Imprisoned?
Making your pretender start the game asleep refunds a massive amount of design points for you to use. For this reason, you should probably delay your god’s awakening for as long as you can, if there’s no substantial benefit to his awakening.
Awake
Awake means you start the game with your pretender in your fort. There’s only ever one reason to do this, and it’s that you want to have a more powerful expansion during year 1, when most of the world is unclaimed and up for grabs. Taking your pretender awake should be done if you have a powerful incarnate bless that will significantly boost the power of your sacred troops, or if you have a powerful pretender who can reliably capture provinces with minimal preparation.
Dormant
Dormant means your pretender will wake up roughly around turn 12. This means he’ll arrive too late to help you with the early game expansion, (which is usually wrapping up by now) but he can help you search for magic sites, research, craft items, or fight against other players, depending on how you designed him. Around the time he awakens, most players will start looking for easy targets to annex. A dormant pretender with either a strong body or a strong incarnate bless can help dissuade other players from seeing you as this target.
Imprisoned
Imprisoned means your pretender will wake up roughly 3 years into the game, which is a long time to wait, so don’t take an imprisoned pretender unless you have good national troops that can hold off an invasion by powerful enemy sacreds with a strong bless. Giving your imprisoned pretender an incarnate bless or an expensive body is a huge waste, as a significant portion of the game will go by without either of these things benefiting you in any way. However, you can still have a powerful bless, by stacking up cheap minor blesses like strength or defence skill.
Scales
This is your nation’s economy, so named because you take from one and give to another to balance your nation the way you like. You will want to take design points from parts of the economy unimportant to your strategy, and use these points to make either the other parts of your economy or your god stronger.

Dominion

Dominion spreads out from your god, your prophet and your temples and overwhelms weaker dominions nearby. It applies your scales to provinces you have dominion over; it also provides limited vision to the area; provides bonus morale to friendly troops and morale penalties to enemies; and it makes your god much stronger when in friendly dominion, and much weaker in enemy dominion. If you have no provinces left with your dominion, you lose the game, so 4 is considered the bare minimum. You will usually want to set dominion based on the number of sacreds you would like to recruit each turn, as this is limited by dominion. If you want to keep enemy dominion out of your lands then you will also want a higher dominion score.
Order/Turmoil and Production/Sloth

These two scales mainly tweak your recruitment costs: Recruitment Points for Order and Resource Cost for Productivity. You need these scales to be adjusted based on what your limiting factor is when building an army. For example, if a unit that you expect to form the bulk of your army costs 10 gold 25 resources 10 rec points, then when you are building an army of these, you will probably find yourself running out of resources before you run out of recruitment points, so you can take Productivity to produce them more quickly or Turmoil to free up more design points. If your units are expensive in gold compared to resources or recruitment points, it’s safe to take both turmoil and sloth, since gold will be your limiting factor. Test things out and see if you find yourself constantly short on either rec-points or resources, and adjust these scales accordingly until they are evenly balanced (though this will always vary somewhat from fort to fort).
Heat/Cold

Each race has an ideal temperature and deviating from this reduces income. However, throughout the year, temperatures fluctuate naturally, making heat/cold, one of the least-impactful economic scales. For this reason, heat/cold is commonly used as a dump stat. At the very least, taking either heat+1 or cold+1 from your preferred climate is strongly recommended as any nation. Whether you go heat or cold, and how far, depends on a number of considerations. The most important one: troop mobility. In summer it takes 6 movement points to cross over plains. Look at your nation’s troops (specifically, look at the slowest ones you intend to use in your armies). Do they have map move 12 or more? If so, they can move through 2 friendly plains/farms provinces at a time. This is extremely useful as it allows you to rapidly relocate armies as the strategic situation develops. Do you have less than 12 map move? Then your troops will have to trudge it out one province at a time. In cold-1, lands will become covered in snow and will be slower to move through, which might mean that units that can go 2 provinces at a time in summer can only go 1 province at a time in winter. For this reason, you should go for heat if your troops are MM12 or higher. If they are lower than MM12, cold isn’t a bad idea, as it lets them cross rivers, which helps to mitigate the mobility disadvantage of having to move 1 province at a time. Another consideration is fatigue: your units will tire more quickly in extreme temperatures (unless they have resistance to heat or cold). If you rely on troops with more than 6 encumbrance, then milder temperature might be better. Do you have fire mages? Fire spells will tire out your mages quicker in cold provinces, so don’t make your dominion too cold. As a final note, some nations (eg. Abyssia) have strong affinity for extreme temperature and their units will be much stronger when fighting in temperature they like.

Growth/Death

Population directly corresponds to income, resources and recruitment points. Also, population will grow exponentially in growth scales. What this means is that growth is the single best economic scale in the game and is almost always put to 3, as any province you hold will increase in value so much over a game that the income provided by growth overshadows the income provided by any other scale. Death is debilitating to your economy and only ever taken by nations that are already forced to kill their own population (EG. Lemuria) or by nations that can control the rate that their dominion spreads (EG Mictlan) because they can just keep enough dominion on the map that they don’t die, while using their neighbor’s dominion for their economy.
Luck/Misfortune

Luck is the second-best scale in the game after growth for making lots of money over the course of a game, with all things averaged out. Unlike growth, the income comes in random, occasional bursts, so it can be unreliable, but can also potentially be a huge swing in power. One benefit luck does have over growth, however, is that luck will also provide you with magic gems and heroes. Depending on your nation, these heroes can be extremely powerful mages. Depending on what you can do with the gems, these may be more valuable to you than gold. Another benefit of Luck over Growth is that events have a chance to trigger for each province you own, regardless of the province quality. So barren, dead wastelands are still valuable under luck, while virtually useless under growth. This makes Luck a favorite for nations like Lemuria that kill their own population. Misfortune events will cause your nation to be constantly raided by Independent NPC armies, so misfortune is a good dump stat for nations that have good troop mobility or good thugs. If you struggle to respond to persistent attacks across your kingdom, avoid misfortune. Taking drain and misfortune will cause you to lose magic gems randomly.
Magic/Drain

These affect your research speed. Since this is a flat bonus that applies to each mage, if you have cheap, spammable mages (EG 50 gold level 1 mages) then you can rapidly blitz through the tech tree with Magic3. If your mages are all expensive and have high research skill, then drain will have less of an impact. Another consideration is that Magic Resistance is lower in Magic scales, and higher in Drain scales. Nations with banishable troops (EG. MA Ermor) tend to like drain because it makes their troops more resistant to banish. Nations with good astral mages tend to like Magic because astral can do some nasty things to troops with low MR.
Bless
A bless is a custom buff spell you design at the beginning of the game. You can use your design points to make it as powerful as you want. However, you can only cast it on sacred units and it can only be cast by holy mages (AKA priests). What you choose as your bless should synergize well with your sacreds, emphasizing their strengths and shoring up their weaknesses. Blesses are most dominating in the early game, when nobody has researched any other buffs.
What are your sacred troops?
Normal human soldiers
Then consider…
- Luck (Astral): Due to their small amount of HP, humans tend to die easily to evocations, or getting smacked by a giant, or getting lance-charged by a knight, or just about anything really. Luck will make your units remarkably hard to kill, and will let them take powerful evocations to the face without flinching, exhausting enemy mages and letting them survive much longer in melee with enemy troops.
- Barksin (Nature): This can be useful during early expansion and in early wars. Protection (Nature 1) and Wooden Warriors (Nature 2) does the same thing as this bless and is a very easy spell to research and cast, so your bless becomes obsolete by the midgame, but if you can gain a strong advantage during expansion, it might be worth it.
- Stygian Flesh (Death): Same as barkskin, but useless vs thugs and many enemy sacreds due to magic weapons. Less reliable but cheaper.
- Attack Skill + Shock Resistance + Defense Skill + Strength (3 of each: Fire/Air/Water/Earth): If your sacreds are just regular guys with nothing going for them except a magic candlestick on their character sheet then consider if they’re even worth a powerful bless at all. Magic diversity is useful for any nation, and picking up a cheap bless on a rainbow pretender can give your sacreds a little more punch while also giving you a strong mage that serves a useful midgame purpose.
Mounted units with high (16 or more) defence
- Quickness (Water): Getting surrounded is the biggest problem that a high-defence unit can face, as being attacked by multiple enemies lowers your defence score. Quickness is the most powerful offensive bless in the game, and as the saying goes, the best defence is a good offence. Quickness lets your sacreds quickly kill enemies before they can get surrounded and harassed. Also, since mounted units are already fast and quickness doubles their speed, this lets you blitz quickly across the map and pull off flanking attacks, and massacre fleeing enemies to the last man.
- Awe (Fire): Reduce the amount of attacks made against your unit, which will even further reduce the harassment penalties they get. If you have Awe and 20+ defence, then you will be virtually untouchable by nonelite enemy troops and can kill endless numbers of them, limited only by fatigue.
- Defence Skill (Water): Push that defence skill even higher and make your units almost impossible to hit. Mounted units are more resistant to harassment penalties from being surrounded, so that makes this a good pickup.
- Blood Surge (Blood): This is a huge benefit to all your combat stats and the only requirement to activate it is that your sacreds need to kill a single enemy, which is quite easy to do if you have a lance that does bonus damage to the first unit it hits.
- Swiftness (Air): An off-brand knockoff of quickness. It’s not nearly as good, but it is a cheap way to increase your mounted unit’s ability to rush down enemy mages and massacre fleeing foes. Perhaps more importantly, it’s also a cheap way to stack defence alongside the defence buff from water.
- Twist Fate (Astral): Since your units almost never get hit, twist fate will hedge against taking a bad roll. If your troops have glamor, then twist fate will keep glamor active for longer (since glamor ends when your units are hit).
Units with high protection (16 or more)
- Hard Skin (Earth): If your units have 5 or more natural protection (IE your sacreds are big tough monsters), give them Hard Skin. This will stack with their natural protection, and can stack further with their armor if they’re capable of wearing any. If your pretender is an awake expander, this will also be a huge benefit to them when they’re fighting in friendly dominion.
- Barkskin (Nature): If your units are squishy humans in strong suits of armor and have less than 5 natural protection, barkskin is a good pick-up, since it sets their natural protection to 10, which stacks with their armor protection and can make your sacreds ridiculously tanky in the early game. Barkskin does not stack with Hard Skin, so pick one or the other. Find some way to shore up the fire vulnerability if you expect to be fighting fire mages or your troops will be roasted alive.
- Stygian Flesh (Death): Wannabe barkskin. Cheaper but easily countered by magic weapons (usually found on thugs and sacreds). At least it doesn’t make you vulnerable to fire.
- Fateweaving (Astral): Great for units that are heavily-armored tanks with weak attacks that never seem to be able to kill anything. When enemies attack your tanky units, they will become fate-woven and much easier to kill. (A fate-woven enemy will take more damage from attacks).
- Heat/Chill Aura (Fire or Water): Also great for high-defense low-offense tanks. Instead of killing your enemies with superior combat skills, just outlast them and execute them once they’ve fainted. Especially good versus thugs without the right resistances.
- Reinvigoration (Earth): Units with heavy armor also tend to have high encumbrance, which means they’ll quickly become exhausted in a fight and then are easy pickings. Reinvigoration can help mitigate this, and it’s also a great bless for your sacred mages.
Expendable troops with low cost (10 gold or less)
- Charged Body (Air): Turn your troops into landmines and put them in the way of expensive enemy sacreds or cavalry. Watch as their 50 gold unit with a super expensive bless kills itself on your 10 gold unit with a cheap bless.
- Blood Vengeance (Blood): If you want to make a serious commitment to the human landmine strategy, blood vengeance lets you kill anything that damages your troops, particularly, enemy mages. Mix your sacreds in with the rest of your army. When enemy mages drop spells on your troops, they suffer that damage returned to them and die. This bless is expensive and doesn’t help with expansion, so don’t take it awake. Fighting in magic scales also helps make sure that the blood vengeance isn’t resisted.
Giants (units that are size 3 or more and have 30HP or more)
- Regeneration (Nature): Regeneration works great on units with high HP, as the regeneration effect increases based on total health.
- Fortitude (Earth): Effectively doubles your big bag of HP when in melee. Synergizes great with Regeneration but it is extremely expensive to do both.
- Blood Bond (Blood): A much more affordable (and sometimes better) alternative to fortitude. Works great with regeneration as it disperses the damage and then each unit regenerates individually. Works great with berserkers because it makes all your sacreds go berserk at once.
- Blood Surge (Blood): Always a nice pickup, especially for giants since they tend to flatten the first person who goes toe to toe with them. The extra attack will help you kill things faster and is good for repel (since giants get a length bonus to their weapons). The other stats are welcome too.
- Quickness (Water): Giants have attacks that are very strong, and can kill most enemies in 1 hit, but are so big you can’t fit many of them on the front lines, and so you might not be able to kill things as quickly as you would expect. Quickness will let them make more attacks per turn and push more quickly into the enemy lines.
- Elemental Resistances (Fire/Air/Water/Earth/Nature): These big guys make attractive targets for mages, and getting nuked down quickly by massed thunderstrikes is the bane of their existence.
Units with multiple attacks
- Quickness (Water): Turn your troops into absolute demons who will race across the battlefield, instantly massacring anything in their path.
- Strength (Earth/Blood): If you have extra attacks that are based on unit strength (IE. your sacred is not a mounted unit that is using its mount’s body as a weapon) then increasing strength can make your sacreds very frightening as the bonus damage will apply to each attack. Stacking strength multiple times (+4 to +8) is usually much better for dealing damage than elemental weapon enchants, and it doesn’t require an incarnate pretender.
- Magic Weapons (Astral): Good for fighting units with Etherealness (IE Ghosts) or Invulnerability (IE Stygian Flesh). Counters mistform too.
- Lightning Weapons (Air): The best of the elemental weapon enchantments in melee. While probably not as good for general purposes as stacked strength, it ignores armor (which makes it good at dealing with thugs that can stack their protection score well over 30) and has a good chance of stunning the enemy with each hit. A stunned enemy is a sitting duck that can be easily finished off. Units that attack more often trigger this effect more often. This is (potentially) more useful than strength on mounted units, since the mount’s attack (EG. Hoof) will benefit from it but won’t benefit from strength buffs.
- Attack Skill (Fire): Units with multiple attacks tend not to worry that much about high-defence enemies, because they can harass them down. But if your sacred has less than 12 attack, then a good portion of its attacks will be whiffing. Take Attack Skill to make sure they hit.
- Blood surge (Blood): A great pickup to make your sacreds more deadly. If your sacred is a glass cannon with a strong offence but a weak defence, then maybe pass on this and take Strength or Attack Skill instead, because you may find that they don’t live long enough to take full advantage of the stat boost.
Shapeshifters with multiple forms
- Shapeshifters: Tend to be quite dangerous in their animal form. Use the advice for units with multiple attacks as well.
- Luck (Astral): Luck gives a 3/4 chance to ignore killing blows and triggers independently on the death of each form. So you essentially get the luck benefit twice on a unit with 2 forms.
- Resilience/Strong Vitae (Nature/Blood): The bonus HP applies independently to each form. So it effectively doubles the amount of HP you get from your bless on a shapeshifter with 2 forms.
Archers or units with ranged weapons
Because archers can concentrate fire onto a single area, and don’t benefit as much from strength as melee troops, this makes weapon enchantments more attractive.
- Withering Weapons (Death): Any human unit hit by your arrows is now on a death timer if they fail magic resistance. They will age rapidly, which causes their combat skills to deteriorate. Eventually they will just drop dead. Even if they retreat, they will continue to age and die before the battle is over.
- Death Weapons (Death): Another death sentence for anyone struck. Your arrows will deal additional magic damage that can go through armor. Also, units hit will become diseased and die within the year. (So you can put an end to someone’s awake expander or thug using this, provided you can lay enough fire on them to bypass their magic resistance).
- Unholy Weapons (Blood): Great for taking out enemy sacreds and awake pretenders by dealing a lot of extra damage. Doesn’t help versus regular troops.
- Precision (Air): Hit more often. Precision is also quite useful for your mages.
- Flaming Weapons (Fire): Deals some extra damage. It’s quite useful against enemy archers as they tend to be lightly-armored. Flaming weapons isn’t very good against units with more than 12 armor, but is still capable of dealing damage on a good roll.
- Magic Weapons (Astral): Situationally good when fighting ghosts, vampires or other units with magical resistances.
Flying units
- Death Explosion (Fire): Amusing as heck, turn your flying units into homing missiles and drop them on the enemy back-line to kill their mages. With death explosion, even if they die to the bodyguards, they might take out a nearby mage. Be mindful of clumping together your own mages if they are sacred.
- Quickness/Strength/Attack Skill/Magic Weapons (Fire, Earth, Blood, Water, Astral): Flying units tend to be glass cannons. You want to kill the units posted on the back line on guard commander and chew through to the enemy mages. You’ll want to do this before the dopes nearby notice you and surround you. To this effect, you want to be as efficient at murder as possible, and any of these options are a good choice.
- Magic Resistance/Elemental Resistance (Astral, Fire, Earth, Water, Air, Nature): Since you’re going to be targeting the enemy’s mages you can expect your flyers to be the target of a lot of spells flung at them point blank. It’s not a terrible idea to make sure they can survive the barrage.
Undead
- Quickness (Water): Undead units don’t suffer from encumbrance. This removes the biggest downside to quickness (besides the design cost) and makes it an excellent pick.
- Magic Resistance (Astral): You will want them to be able to resist banishment spam and lategame spells like undead mastery.
- Undying (Death): This is basically 2 hp with no downside for undead, twice the effect of resilience or strong vitae.
- Reforming flesh (Death): More for your undead thugs than your sacred troops. Your troops probably benefit more from undying.
- Fire/Shock Resist (Fire/Air/Earth): Undead are naturally resistant to cold and poison. Consider making your sacreds immune to the other elements as well. Your enemies will definitely want to put down battlefield wipes to remove your giant horde of longdead, and you want at least your sacreds to survive.
Small, weak summoned creatures
Thunder Weapons (Air): Gives them an attack that can penetrate armor and stun enemies.
Fire Weapons (Fire): Gives them an attack that can deal decent damage to enemies with low armor (ideally 12 or less).
Undying (Death): Helps them survive longer by giving them more HP.
Charged Body (Air): Spam out cheap sacreds and let the enemy unleash lightning on themselves. Beware that taking charged body without also taking shock resist will probably make your main recruitable sacreds almost unusable.
Thuggable Commanders
- Regeneration (Nature): Probably the single best bless for a thug, as it helps eliminate the minor damage that accumulates over a fight; and it stacks with other types of regeneration.
- Reinvigoration (Earth): Also extremely useful for thugs, as it helps them fight for longer without becoming fatigued
- Blood Surge (Blood): Helps thugs chop through the endless hordes of enemy province defence
- Awe (Fire): Useful for thugs with high defence.
Sacred Mages
Note: you can make any non-sacred mage sacred by giving him a Shroud of the Battle Saint, a cheap item that can be forged by any astral 1 mage once you research Construction 4.
- Precision (Air): Increases accuracy of spells. Decent for evocation casters. (Air or Fire mages in particular).
- Far Caster (Astral): Increases range. Mages that are farther back from the action are usually safer. Mages that are farther forward with this buff might be able to target the enemy mage line with their spells.
- Arcane Finesse (Astral): Good for death mages and astral mages as these schools have spells that can usually be resisted. Late game astral strats usually involve boosting magic penetration as high as possible and killing enemy commanders.
- Reinvigoration (Earth): Mages will typically fatigue themselves out in battle. With reinvigoration they can cast more spells over the course of a battle.
- Magic/Elemental Resistances (Astral/Fire/Water/Earth/Air/Nature): Some spells can target the whole battlefield. Don’t let your squishy and expensive mages die to these spells.
- Unaging (Nature): Mages (especially your more expensive mages) tend to be old. This means they are slower on the strategic map, fatigue quicker in combat and occasionally get diseased and DIE. Unaging has the unwritten effect that it makes them younger when you hire them, so they’re no longer old. Not having to replace your 300 gold cap-only mages every year can actually be quite beneficial. It also makes your sacreds more resilient to the death spells Burden of Time and Decay.
- Arcane/Undead Leadership (Astral/Death): some nations (EG. Scelaria, Abyssia) will be able to easily summon more monsters than they can actually lead. This will lead to forts filled with endless monsters while your mages carry only a small fraction of your troops into combat. Use this bless (stacked 2-4 times) to let your low level priests act as commanders and carry more troops into battle.
- Regeneration (Nature): Very good for giant mages with blood or astral. This lets them act as communion slaves and your communion masters can drain their life to cast spells while the slaves regenerate the damage. Not recommended for human mages as they will only regenerate 1 or 2 hp a turn, which is too weak to cast spells from HP.
Thugs
Thugs are commanders that have been given magical items and who fight in direct combat (as opposed to fighting with spells). They are usually sent in solo or in small gangs to capture undefended enemy provinces or kill enemy thugs (by using teleport or cloud trapeze). Most thugs are designed to be economical to produce, and sent out on dangerous missions behind enemy lines, not expected to return. A variant of the thug, called the Supercombatant, is your ultimate, money-is-no-object superweapon designed to be as powerful as possible and confront enemy armies head on. Most successful thugs have some magic skill that they use to buff themselves before combat.
Building thugs to conquer provinces
The bare minimum essential quality of a thug is that it needs to be durable enough to survive being surrounded by province defence. There are four ways (non-exclusive) to build a thug to do this. If your thug doesn’t fit any of these criteria after he’s fully buffed, he’s probably going to be unreliable at his job and get killed by a random spearman. Use magic items to improve the areas that your commander is already naturally good at. It’s better to be really good at one thing than okay at everything.
Defence Skill Tank
If your defence skill is significantly higher than enemy attack skill, then they will almost never hit you in melee. Against small numbers of PD, 20+ defence is good enough for a defence tank with a mount and some buffs (eg. Mistform); 25+ is ideal for larger numbers of PD. However, you have to protect your defence skill from dropping, because if a large amount of enemies attack you at once, you will become “harassed” and your defence skill will drop to the point where you start taking hits. Mounted units are more resilient to this, but not immune. To deal with being surrounded, you have to reduce the amount of attacks being made against you either with Awe (Shield of Gleaming Gold) or Vine Shield or some similar effect which prevents enemies from attacking all at once.
If you have a weapon that is longer than the enemy’s weapon (Stone Bird or Dancing Trident are good for this) and your attack skill is significantly higher than the enemy’s defence skill (close to 25 is ideal), and the enemy has relatively low morale (beware of undead), then you can tank using your attack skill via the repel mechanic. Like tanking with Defense, repel is subject to harassment and becomes weaker when multiple enemies are attacking at once, so you will need some way to stop them from all attacking at once.
Protection Tank
If you have 25+ prot (30+ is ideal), most non-elite human units will struggle to deal any damage to you. Be wary of high-damage piercing weapons (like knight lances) or units with unusually high strength (like giants). The most common way to achieve high protection is casting Ironskin.
Regeneration Tank
If you have a lot of HP (40+, but the more the better) and your thug is at least somewhat tanky in other ways (EG you have 18+ protection, and some defensive buffs like body ethereal and liquid body) then stacking regeneration on them will often mean that they can regenerate damage faster than the enemy can deal it.
A note on Fatigue
Many thugs die when they get tired due to fighting a large number of enemy troops for too long. One way to deal with this is to make sure that either they have a reinvigoration score close to their encumbrance in the province they’re going to be fighting in (equal is ideal) you can do this with magic items like boots of the messenger. Another way, is to make sure that they have the ability to kill or rout enemies quickly enough that they win the battle before getting tired (weapons that deal AOE damage like frost brand are good for this; horror helm is good for scaring enemies away). If your fatigue goes over 50, your thug’s combat capabilities will drop. If it goes over 100, they will faint, and probably be killed.
Building thugs to kill other thugs
Every strategy has a counter. Is your enemy…
- Defence Tanked:Â Remove your opponent’s mobility with spells or items that root them in place (like a Vine Shield or a Vine Whip). This will drop their defence to 0 and they can be easily killed. An alternative is to boost your attack skill high enough to match them. Items like Burning Pearl are good for this.
- Attack Tanked:Â Counter repel with high defence (try a Main Gauche of Parrying), high morale (Dragon Helmet) or length 5 weapons (like Enchanted Pike).
- Protection Tanked?:Â Use high-strength units (like giants) or weapons that are Armor piercing (like Greatsword of Sharpness), or attack him with elemental spells or weapons that he doesn’t have resistance to (like Lightning Spear).
- Regeneration Tanked?:Â The easiest way is to surround it and kill it with a gang of lesser thugs. If it’s too strong then wear it down with items like Star of Heroes (breaks its armor), Black Bow of Botulf (removes its ability to buff itself), Eyecatcher (blind it and make its combat stats significantly worse), Bane Blade (make it age rapidly), flesh eater (chest wound, permanently adds encumbrance), try to insta-kill it (heartfinder sword), or disease it (axe of hate), etc.
Building thugs to kill entire armies (Supercombatants)
This is more of an art than a science. Anything you do can be countered by a prepared opponent. A supercombatant is more like a way to suprise an unprepared enemy than a reliable strategy. Still, it’s fun. You will need:
- A Strong Chassis – A Titan pretender, an King of Elementals, a Demon Lord, a Tartarian or any other big, high level summon are ideal. They should have naturally high stats, and have good access to buff magic.
- Over 60 HP – Enemy mages will be throwing spells at you and you need to be able to take at least a few hits to the face.
- Regeneration – you will take damage, no matter how good your tank is, and you need to make sure you’re healing it faster than it’s being dealt
- Over 30 Protection – ranged attacks bypass defence and repel.
- Close to 25 Magic Resistance – you don’t want your pretender to be insta-killed by spells like soul slay or stolen by spells like hellbind heart. Amulet of Antimagic is a great item.
- Elemental Resistance – depending on your enemy’s mages, you want to be able to tank through large numbers of elemental spells being rained down on your head
- Multiple or Area-wide attacks – you need to be able to kill large numbers of troops fast or you’ll get bogged down. Fire Brand and Frost Brand are two example weapons that let you kill multiple targets at once.
- Reinvigoration – You need to be able to fight without increasing your fatigue. To do this you need either reinvigoration equal to your encumbrance in the terrain you’re fighting in, or you need a buff spell like Soul Vortex that does it for you.
- Buff spells – Fire, Earth, and Death are the best paths for a SC to self-buff with; Astral is a liability (because astral mages can be killed by Magic Duel). Phoenix Pyre + Soul Vortex is a deadly combo that will make your SC invincible unless they can be killed multiple times in rapid succession.
- Berserk – Not essential for every situation, but if the battle goes on too long, the game will force the attacker to rout. Berserk units ignore this. Flesh Eater is an easy item to get that makes your unit go berserk when wounded.
Thug Spells
The best ones are marked with an asterisk (*)
- Blessing* – how good it is depends on your bless.
- Holy Avenger – damages attackers.
Fire
- Resist Cold – situational.
- Fire Shield* – good for clearing large numbers of weak troops.
- Phoenix Pyre* – makes you invincible as long as you don’t run out of fatigue.
Water
- Resist Fire – situational.
- Liquid body – a worse temper flesh that water mages are stuck with, reduces speed and strength.
- Ice Shield – only underwater.
- Quickness – doubles fatigue per turn, be careful.
- Breath of Winter – good for fatiguing-out enemy thugs.
Air
- Mistform* – reduces all damage taken to 1, cancelled by magic weapons.
- Mirror Image – stops a few hits, good for defence tanks.
- Cloud trapeze* – for mobility and killing enemy thugs.
- Flight – useful for assassinating enemy commanders during a battle.
Earth
- Resist Lightning – situational.
- Earth Might – increases damage done in melee.
- Stoneskin – raises protection by a lot, stacks in a limited capacity with ironskin.
- Ironskin* – best protection spell in the game.
- Temper Flesh* – halves damage from physical attacks.
- Summon Earthpower* – gives +4 reinvigoration.
- Legions of Steel – combos with bracers of protection, improves your armor’s protection.
Nature
- Resist Poison – situational.
- Barkskin – raises protection by a little.
- Elemental Fortitude – raises all your resistances.
- Personal Regeneration* – extremely useful for units with a lot of HP.
- Enlarge – raises HP and strength.
Death
- Skeletal Body – adds piercing resistance, useful against knight lances.
- Invulnerability – adds a lot of protection, but is hard to cast, and easy to counter. Better than ironskin for fighting PD.
- Soul Vortex* – drains endurance from enemies, insanely powerful when paired with phoenix pyre.
Astral
- Resist Magic – useful if your enemy is trying to soul slay you.
- Teleport* – for mobility/counter-thugging.
- Astral Shield* – stuns enemies that try to attack you.
- Body Ethereal* – good vs. regular units, worthless vs enemy thugs with magic items; you can have another mage (called a “fluffer”) follow your thug around and cast this on him at the beginning of the battle and then run away.
- Personal Luck – protects against death blows. Good for fighting supercombatants who can kill thugs in 1 hit. Not worth the casting fatigue in most other cases..
- Twist Fate – protects against the first hit to deal damage.
Blood
- Hell Power – raises your thug’s combat stats but horror marks them, so random monsters will occasionally try to assassinate him.
- Damage Reversal – very strong, but is at the end of the research tree for Blood.
Crosspaths
- Mossbody – Nature + Water – Unreliable, probably not worth the casting fatigue.
- Strength of Gaia* – Earth + Nature – Gives regeneration, barkskin and strength.
- Flying Shield* – Earth + Air – Randomly blocks attacks.
- Stygian Skin – Death + Water – Gives prot against non-magical attacks.
Learning Street Fighter 5 was a punishing, exhilarating experience – GW
I practiced combos until I started seeing them in my sleep.
New World dev diary reveals the factions and lore of the MMO’s PvE – GW
Amazon Game Studios explain the world history behind the monster-ridden island.
Azur Lane: Crosswave – Easy XP Grind Guide – GW
This guide explains how to easily get your shipgirls to level 200 without the help of those additional DLCs.
Guide to XP Grinding
Getting Ships to 100
Grind the highest stage you can do. Alternatively, you can also farm for A Points and M Isomers while getting XP. M Isomers are needed to make Cognitive Chips to awaken ships past level 100.
Also, it seems like Neptune’s M Isomer is only available through Research Facility. So, whenever it shows up on Good Find, buy it.
How It Works (Tailored Towards LV 100+)
Assuming you already have a lot of awakened ships and is struggling to get all of them to level 200.
Here is a quick way to do it:
Important note: Some ships are locked / can’t be used on certain stages because they are the opponent.
1. Get Amazon as one of your support ship and upgrade her skill.
She provides a fleet-wide XP boost skill (50% boost at Skill Level 10).
- Q:Â How do I get books to level the skill?
- A:Â Extreme battle from main menu or Research Facility.
2. Grind your main fleet to level 160ish on Final Chapter: Battle 13 against Suruga.
Base XP without Amazon in the fleet.
Since the stage gives a ton of gold and xp, you can sit here for a while.
Stage’s ship restriction:Â
- Suruga
- Nagato
- Ning Hai
3. Keep doing Extreme Battles until these emergency / urgent missions show up.
You will be prompted with this dialogue box when you are eligible for urgent missions.
If I recall correctly, Emergency missions start spawning when you hit lv60 in Extreme Battle. Once they spawn, any battle you do in the game will have a chance to trigger an emergency request. Keep in mind that these missions are going to disappear if you do another battle after they spawn just like Akashi’s “Good find”. However, if you press yes on the “Fight the same opponent”, all the missions and akashi’s good find will spawn whenever you end your grind session.
4. Do those emergency missions at least once
In order to grind these emergency missions, you need to at least clear them once and wait for them to spawn again to get this screen that lets you repeat the stage non-stop.
5. The grind begins…
These emergency missions give an enormous amount of XP per clear.
Base XP without Amazon in the fleet.
Additionally, you can get alot of gold equipment blueprints from these stages.
You can keep grinding with the same fleet even if they’ve reached lv 200, others ships in the dock can just benefit through passive XP.
What Fleet Did You Use?
It seems like DDs are pretty strong in this game, so I went with a torp-meme fleet.
XP Grind Fleet:
- Hood is interchangable with Laffey.
- Hood provides 100% increased reload for allies skill while Laffey provides a passive 50% TRP and FP boost.
Clearing Fleet:
- Full IJN fleet, Ikazuchi boosts TRP by 50%, 10% for FP and RLD.
- Shiratsuyu boosts TRP by 60%.
- Abukuma boosts TRP by 75%.
Warhammer: Vermintide 2 – Advanced Flamethrower Guide – GW
Many players believe flamethrowers to be useless weapons, but IMO they are extremely strong. Problem is, they require a bit of knowledge and lots of experience in order to be used correctly. They are extremely hard to master. Here I explain how flamethrowers work and how to use them to best effect, provide some recommended builds, and show off my flamethrower techniques in a video of a Cataclysm run with bots.
Guide to Advanced Flamethrower
Video
This guide consists of 3 YouTube videos that I’ll link below, but for those who don’t want to watch the videos I’ll provide a short text summary in the next sections. If you choose to watch the videos, there’s no need to read the text. The first video is the most important one – it explains the mechanics and techniques. The other two are not essential.
Flamethrower Mechanics
- Flamestorm Staff and Drakegun are essentially the same weapon, so I’ll be referring to both as “Flamethrower”.
- Left click attack: instant, high heat cost, no DOT, moderate damage against everything, very high stagger, prevents weapon switching for a short time after use.
- Right click attack: requires charging up, high heat cost of charging up, low heat cost of shooting, applies DOT, high damage against everything except armor, low damage against armor, moderate stagger, doesn’t prevent weapon switching.
- Both attacks do zero damage against Super Armor (Chaos Warriors, etc.) unless you crit. Right click attack applies the DOT that does damage Super Armor.
- Both attacks do higher DPS when shooting a single enemy compared to when shooting several enemies.
- With the right click attack, the cone of effect that damages enemies is much wider than the cone that damages teammates.
- Bug: while shooting the right click attack (so you’re holding both your mouse buttons), if you get hit, you will shoot a left click attack once the hitstun wears off.
Flamethrower Techniques
- Use left click attack against Stormvermin, Rattling Gunners, Warpfire Throwers, and Bestigors. Use right click attack against everything else. If mixed horde, still use right click.
- Do not use Flamethrower against Chaos Warriors. Bring a melee weapon that can deal with them. If you’re Battle Wizard with Lingering Flames talent, apply flamethrower DOT then use melee.
- Left click attack costs a lot of heat, but you can spam it with this technique: get to 100% heat, wait for your heat to naturally dissipate to about 97%, shoot again, repeat endlessly. More effective on Ironbreaker than on Battle Wizard because Ironbreaker has a faster heat dissipation (if we disregard BW’s passive ability).
- When using the right click attack, do not fully charge it. Instead, use short bursts: charge for a about a second, then shoot. Never charge more than you’re going to release. When you need to start firing as quickly as possible, start holding RMB and then immediately start holding LMB too – then the weapon will automatically start firing upon reaching the minimum charge.
- When overheated, do not switch to melee and wait for the weapon to cool down by itself. Instead, hold R to vent manually, paying with your health. Use Natural Bond trait on your necklace to offset the health cost of venting. If you’re Battle Wizard, you can rely on passive venting most of the time.
- When teammates obstruct your line of fire, aim your flame cone above their heads. You will hit the enemies behind them while not causing friendly fire (because your damage cone is much wider for enemies than for teammates). However you will blind them and distract them, so only shoot above their heads when can’t shoot otherwise.
- Don’t ever use your melee weapon to fight hordes. Your flamethrower does it much better. When you you’re surrounded by enemies so you can’t use flamethrower safely, use block/push/ult to reposition in such a way that all enemies are in front of you. Then start flaming.
- While you can’t kill far away specials, it’s your job to kill the ones that come close. Flamethrower is excellent at this. Use left click against Rattling Gunners and Warpfire Throwers, right click against all other specials. You can easily kill Packmasters and Assassins that are coming through a horde. If you’re Battle Wizard with Lingering Flames talent, once you apply a DOT to a special you mark it for death – even if it escapes, it will die.
- In boss + horde scenarios, your job is to nuke horde. If you’re confident enough, you can do this even while kiting boss.
- While flaming a horde, you can’t see it. Spam your “mark” button to notice specials and elites (especially monks/zerkers) that are coming through your flame cone.
- Know which enemies you can stunlock with your right click attack and which ones you can’t. Ironbreaker with Drakki Wrath talent is better at stunlocking than Battle Wizard.
- As mentioned in the Mechanics section, if you get hit while flaming you will shoot an unintended left click attack, which will add a lot of heat and prevent you from switching to melee in order to block. This is a major threat, but if you expect it you can learn to mitigate the harm (e.g. rely on dodge rather than block when it happens, never get close to full heat when using right click attack).
Perky Little Things – Complete Walkthrough Guide (100% Achievements) – GW
This guide explains how to obtain all achievements and beat the game.
Comprehensive Achievement Guide
Info
Perky Little Things is a sexualized hidden object game for adults. In this guide we will walk you through all 10 levels. This guide will be full of unmarked spoilers!
Notes
- All items will be listed in this order: Item – where to find/where to use.
- Only a certain amount of items can be found at first in most levels. We will refer you to the next part in the walkthrough when you reach this point. The “Finding Items” list is used as a reference for all items.
- If you get stuck you can use the hint button on the bottom left. It recharges over time and doesn’t affect achievements.
- Turn on Outlines in the options to easily see where you can use items on if you’re stuck
- You can use arrow buttons to move the map
- There are 10 achievements in the game, all are awarded for finishing each of the levels.
Estimated time to 100%: 2h~Â
Christmas Eve In Metropolis
Finding Items
- Carrot – On the snowman, top right corner.
- Inflated sex doll – Top of the house near santa and his deers.
- Pink d.ildo – A bit on the left side, to the right of the christmas tree, scene where they film a porn movie.
- Collar – Scene of the girl riding a colored man, collar is on her neck.
- Flowers – Scene of the girl riding a colored man on her neck, man on the left is holding it.
- Cake – On the left, at the party scene.
- Whip – Top right corner, girl chained to the wall scene. its on the wall.
- Bottle – On the right, man and woman having a romantic evening, on the table.
- Thongs – Scene on the left, guy having sex with a girl and a toddler crying, in the christmas tree.
- Magic wand – On the bottom above the guy putting graffiti.
Using Items
- Carrot – Put it in the mouth of the Elfs having sex.
- Inflated sex doll – Give it to the man sitting on the couch in the brown room.
- Pink d.ildo – Use it on the girl in the bathtub.
- Collar – Give it to the dog on the bottom.
- Flowers – Give it to Santa’s deers on the top of the roof.
- Cake – Give it to the boy in the room next to the girl masturbating in front of her pc.
- Whip – Give it to the man lying in bed in a brown room.
- Bottle – Give it to the man with the flowers.
- Thongs – Use it on the man hanging outside the window on the right.
- Magic wand – Use it on the girl masturbating in front of pc.
Christmas Eve
- Ho-Ho-Ho!
Black Magic Academy
Finding Items
- Cat – Sitting on the roof, top right corner of the map.
- Fertilizer – Bottom right corner of the map near the half horse people.
- Keg of alcohol – The xxx bucket in the room of a magician and girl laying on an altar.
- Picture – Middle of the map, with 3 students and 2 teachers. Pink picture.
- Hammer- Middle of the map, in a hole on the wall.
- Screw driver – In the middle left of the map, guy with 3 girls scene, in the cup.
- Pillow with hearts – In the room above the gate with goblin knockers. bottom left corner of map.
- Magic hat – Bottom middle of the map close to the pillow, on the tree.
Refer to Using Items section below to continue - Watering can – Can only pickup after using Fertillizer on plant, and it should drop.
- Rusty key – Inside the tree, can only pickup after watering the tree.
- Abra cadabra – Inside the safe, can only be picked up after using the key.
- Looking glass – Can only be picked up after using the abra cadabra on the wizard.
- Keg of alcohol – In the room of a magician and girl laying on an altar
Using Items
- Cat – Room with the guy and girl and a cauldrom in between them. on the left bottom of the map.
- Fertilizer – Plant at the bottom left corner of the map (this will drop the Watering Can).
- Keg of alcohol – Hut in the bottom right corner, older guy with 2 girls.
- Picture – In the room with a picture, one frame should be missing, middle right of the map.
- Hammer- On the mirror with the old wizard in red, upper left corner of the map.
- Screw driver – Boy playing on the drums right of the map. below the pictures.
- Pillow with hearts – Same room you found it in, above the gate bottom left corner.
- Magic hat – Magic battle room, guy using a fireball, and girl using a shield.
- Watering can – On the tree near the big gate, middle bottom of the map. It should reveal a rusty key.
- Rusty key – On the room with the save, where the picture we picked up used to hang. With the 3 students and 2 teachers. Should reveal the Abra Cadabra
- Abra cadabra – On the room with the wizard wearing a green robe, on the right. Should reveal the Looking Glass.
- Looking glass – On the upmost room with the broken telescope.
Black Magic
- Abra Cadabra!
Pirates of the Southern Seas
Finding Items
- Pistol – In the room with the organ on the top right. Under the green sea creature.
- Cutlass – Bottom left corner of the map, in a room with the blacksmith.
- Where all crows go – In the bottom left corner of the map, near rock with X.
- Woodcutter – On the small island leaning on the palm tree, bottom left corner.
- Gunpowder – On the pirate ship, near the cannons.
- T.wat hair brush – Right under the cannons, near the cauldron.
- Trident – In the water, statue holding it, middle of the map.
- Shark bait – On the bottom right corner, on the island. can be found on the table.
- Small hey – On the bottom right corner, on the island below the table.
- Hampen halter – Hanging on the wall of the left ship, below cannons.
- Coconut oil – Small island in the right corner, second floor 2 girls and 1 guy.
Refer to the Using Items section below to continue - Cursed coin – After using the gunpowder to blow up the door, pick it up from the chest.
- Bucaneer xo – Can be found only after opening the safe using the where all crows go. it will be nearby.
- Hook – Can only be picked up after using the coconut oil on the pirate.
- Spyglass – Can only be found after using the bucaneer xo on the pirates that used the spyglass.
Using Items
- Pistol – On the back of the ship, one person shooting the rifle and another a pistol
- Cutlass – On deck of ship, pirate and person dueling
- Where all crows go – On the right of the pirate ship, two pirates trying to open a safe.
- Woodcutter -Give it to the pirate with the golden hook standing on the island on the lower left corner.
- Gunpowder – In the left ship, two pirates standing and one is holding a fuse. Middle row. After blowing it up it should reveal the Cursed Coin
- T.wat hair brush – Use it on the pirate with the red shirt on the left, he’s pointing at the wanted poster
- Trident – Use it on the octopus in the top right.
- Shark bait – Give it to the shark trying to eat the pirate in the water on the right.
- Small key – Use it on the birdcage on the left ship, below the cannons. The guy is sitting with a cover over the bird cage.
- Hampen halter – Give it to the man and near the turtle on the right island.
- Coconut oil – Use it on the pirate in the pirate ship, the one that escaped the shark before (bottom right corner) Should reveal the Hook.
- Cursed coin – Use it on the skeleton in the bottom left corner, in the cave with the girl and chest.
- Bucaneer xo – Use it on the pirates looking through the spyglass, on top of the ship on the left. Should reveal the Spyglass.
- Hook – Use it on the mermaid sitting on the rock in the middle of the sea.
- Spyglass – Use it on the girl sitting on the crates, in the bottom left corner of the pirate ship
Treasure Island
- Hoist the sails!
The Good The Bad and the Sexy
Finding Items
- Firmware update – In the back to the future car, bottom left corner.
- Watering can – On the train near the woman in the red dress.
- Saw – On the front of the train, near the cactus.
- Oil can – All the way on the right, on the shelf in the room with the cowboy in the red clothes.
- Nail drawer (crowbar) – In the saloon on the right, room with hearts on walls.
- Large key – In the bar where people play poker, hanging on the wall.
- Android mask – Can be found on the hanged man in the middle of the map.
- Aztec totem – You can find it on the hanged corpse after taking off the mask.
- Kolaloca drink (red potion) – Inside the mayors office in the brown bag.
- Aztec mask 1 – In the room with 4 cowboys on the right (it looks red).
- 1Aztec mask 2 – In the bottom right corner of the map (yellow)
Refer to Using Items section below to continue - Battery – Can be found in the hologram machine in the bottom right corner, can only be picked up after using the firmware update.
- Flower – Can be found on the cactus, need to water it first with the watering can for it to appear.
- Golden d.ildo – Can be found inside the safe, must use the key first to open it.
- Ruby – Can only be picked up after using the battery on the miners.
- Scissors – Can be found after giving the ruby to the man without money, its on the bed.
Using Items
- Firmware update – Use it on the slot in the bottom right corner. Should reveal Battery.
- Watering can – Use it on the cactus near the train on the left. Pick up the Flower that grows.
- Saw – Use it on the person climbing the water tower on the top left corner of the map.
- Oil can – Use it on the red lever near the train.
- Nail drawer (crowbar) -Use it on the saloon sight, op top right Should reveal Aztec 3.
- Large key – Use it on the safe in the bank on the right. Should reveal d.ildo.
- Android mask – Use it on the android laying in the bottom right corner.
- Kolaloca drink (red potion) – Use it on the person at the saloon, the one asking for a drink.
- Aztec mask 1 – Use it on the aztec gate with the girls near it middle of the map.
- Aztec mask 2 and 3 – Use it on the aztec gate with the girls near it middle of the map.
- Battery – Use it on the miners in the bottom left corner. Should reveal Ruby.
- Flower – Use it on the right, the guy and girl near the bank sign hanging out the window.
- Golden d.ildo – Use it on the girl that opened the safe.
- Ruby – Use it on the man without money in the saloon (with 4 girls on the bed) Reveals Scissors on bed.
- Scissors – Use it on the girl in the flying balloon on the left.
- Aztec totem – Use it on the aztec god after opening the aztec gate with the masks.
The Good, the Bad and the Sexy
- Bang! Bang!
From Transylvania With Love
Finding Items
- Cigarettes – In the upper floor on the table with abraham lincoln.
- Wooden plank – In the middle of the map, ground floor, laying against the cupboard. room with the cheff.
- Cook book – Ground floor room with the cook, open the cupboard and its inside.
- Garlic – Bottom left part of the map, inside the dogs foot bowl.
- Bloody Mary – In the cellar on the right, on the table with the vampire.
- Cage key – Bottom right corner, attached to a rope.
- Duck tape – Bottom right corner, in the room with the bathtub.
- Wrench – Can be found in the attic with the bats on the right.
- Aspen snake (d.ildo) – Ground floor on the right, room with a blue leather clothed girl, on the ground. She has a whip.
- Candle – Top right corner, in the window with the girl.
- Metal pipe – On the ground floor to the right, close under the Free Suck sign.
Refer to Using Items below to continue - Something(hand) – Can only be picked up after using the wrench on the warrior.
- Torch – Can only be picked up after using the bloody mary on the corpses on the bottom left.
- Set of false teeth – Can only be picked up after burning the cobwebs on the top left.
- Grave shovel – Can be picked up after using the torch on the grave digger on the bottom left.
- Holy water – Can only be picked up after getting the shovel and using it on the grave. (its inside)
- Sacrificial dagger – Can be picked up after using the holy water on the vampire. (he drops it)
- Alarm clock – Can only be picked up after using the sacrificial dagger on the bed (same place you picked it up)
- Axe – After using the alarm clock on the sleeping vampire, he will throw it at the alarm clock.
- Cross – You will pick it up after using the axe on the graveyard, at the bottom right corner.
Using Items
- Cigarettes – Use it on the man with burning finger on the bottom left, near the no smoking sign.
- Wooden plank – On the girl and guy on top left under the cobweb.
- Cook book – Use it on the girl tied to pole on the left, outside.
- Garlic – Use it on the room in the middle where the vampire is sucking the blood of a girl.
- Bloody Mary -Use it on the ghouls/dead corpses in the bottom left corner. Pick up the torch after.
- Cage key – Use it on the girl stuck in a cage on the top left.
- Duck tape – Use it on the girl with the whip on the right of the screen.
- Wrench – Use it on the armored archer on the left Pick up the hand on the couch after.
- Aspen snake (d.ildo) – Use it on the vampire slayer on the top left corner of the map
- Candle – Use it on the cobwebs on the top left corner. Pick up the set of false teeth after.
- Something(hand) -Use it on the table with the adams family on the right.
- Torch -Use it on the worker with the shovel in the left corner. Pick up the shovel after.
- Set of false teeth -Use it on the girl and servant with the glass in her hand (middle of map)
- Grave shovel – Use it on the graves on the bottom right corner of the map. Pick up the holy water after.
- Holy water – Use it on the vampire and girl with garlic in the middle of the map. Pick up the sacrificial dagger after.
- Sacrificial dagger – Use it on the bed in the scene with the vampire and girl where you picked it up. Closed by curtains.
- Alarm clock – Use it on the sleeping vampire at the bottom left of the map. Pick up the axe after.
- Axe – Use the axe on the cross with the rose at the bottom right corner at the graveyard.
- Cross – Use it at the scene with the vampire and the girl where you also used garlic and dagger.
- Metal pipe – Use it on the girl in red on the bottom floor, right of the woman aiming at the werewolf.
Blood Suckers
- Run for your life!
Eric The Red D.ick Saga
Finding Items
- Amulet of transformation – Can be found on the mast of the viking ship, bottom left corner.
- Chisel – Top left location, on the roof.
- Empty bottle – Top left location, near the old sitting viking.
- Steel key – On the top middle, its on the barrel at the feast
- Chicken – At the table with the food top location.
- Burning arrow – Bottom/middle of the map viking standing on it.
- Fishing net – On the roof of the house at the bottom left.
- Knife – Top right corner of the screen stuck on the gate.
- Lost eye – Bottom middle location near some water.
- Gold coin – Can be found in the bottom right corner of the map, on the rock.
- Refer to Using Items below to continue
- Double blade axe – Leaning against the wall at the bottom left location, can only be picked up after catching the mermaid with the fishing net.
- Crown of konung – Can only be picked up after using the burning arrow on the archer.
- It should drop from the boat.
- Gungnir – Can only be picked up after giving back the eye to the one eyed viking.
- Gammeldansk – Can only be picked up after giving the coin to the viking, it will be on the table.
- Key ring – Pick it up from the roof all the way up and to the left, can only be picked up after using the gammeldansk.
- Helmet of valkyria – Can only be picked up after using the key ring on the valkyria, its at the same location.
- Amanita muscaria- Can only be picked up after using the double blade axe on the mushroom.
- Magic potion – Use the empty bottle on the cauldron after you put the mushroom in
Using Items
- Amulet of transformation – Use it on the bear all the way to the right.
- Chisel – Use it with the stone worker on the bottom right location
- Burning arrow – Use it with the archer at the bottom left location, can now pickup the Crown of konung
- Fishing net – Use it on the mermaid raising her fists on the bottom left location, can now pick up the double blade axe.
- Chicken – Use it on the warrior sitting near the campfire at the bottom left on top of the house.
- Knife – Use it on the tied up girl on the top left.
- Double blade axe -Use it on the mushroom the viking is rubbing, at the bottom right.(can now pick up the mushroom (amanita muscaria).
- Amanita muscaria- Use it on the cauldron at the bottom right corner.
- Empty bottle – Use it on the cauldron after filling it with mushroom
- Lost eye – Use it on the old viking with one eye standing near the three amazons in the top right. can now pickup the spear he drops. (gugnir)
- Gungnir – Use it to kill the bird sitting on the lock where the couple is tied, on top of the house on the left.
- Steel key – Use it on the chained couple at the bottom of the map.
- Gold coin – Use it on the viking at the top left corner. Should reveal Gammeldansk.
- Gammeldansk – Use it on the viking and girl sitting at the top left corner, you can now pickup the key ring on the roof above.
- Crown of konung – Use it on the 2 vikings holding the girl at the bottom location.
- Key ring – Use it on the valkyria at the top right corner of the map, she should now drop her helmet and you can pick it up.
- Helmet of valkyria -Use it on the girl with wolf head all the way to the right, below the valkyria.
- Magic potion – Use it on the girl that was tied up and the viking all the way to the left.
Vikings attack
- For Odin and Fenrir!
Lust Island Adventures
Finding Items
- Vuvuzela – Top middle of the map, camp of girl and old man playing cards.
- One eyed snake potion – Top right part of the map, behind man scaring away snake.
- Crowbar – Holding the big boulder, top right corner of the map.
- Ace of spades – Top right corner of the map, near the dead templar.
- Headphones – on the right, girls using the radio, near the dead templar. Left of the girl sitting.
- Shovel – Bottom right corner of the map, slightly up, leaning against the wall.
- Scissors – in the tool box, bottom right corner of the map
- Banana – Bottom right corner of the map, near the orgy.
- Water Bucket – Bottom middle part of the map,on a cliff near the monkey.
- Military boots (purple) – Near the outhouse, bottom left corner of the map.
- Fish – Bottom left corner of the map, near the lake.
Refer to Using Items below to continue - Holy grail – Can be found only after opening the chest with the crowbar, its inside.
- Torch – Can be found after scaring away the snake with the vuvuzela, the man drops it behind.
- Spear – Can be found after using the the shovel on the man giving girl water.
- Whiskey bottle – Can be found after using the spear on man holding it at top left corner.
- Crystal – After using the whiskey bottle, top left corner the girl puts it on the box.
Using Items
- Vuvuzela – Top right part of the map, man scaring away snake, can now pick up the torch he drops.
- Headphones – Use it on the same man holding his ears, top right corner with the snake.
- Torch – Top right corner, man in a cave near the broken plane.
- One eyed snake potion – Use it on the man and 3 naked girls in the bottom left corner
- Water Bucket – Bottom left corner of the map, girl sitting on a cabinet
- Military boots (purple) – General inside the tank with smelly socks.
- Shovel – Bottom left corner of the map, man giving water to a girl, can now pick up the spear he leaves behind.
- Banana – Use it on the monkey sitting on the tree, on the left.
- Crowbar – Two army girls looking at the golden chest, bottom right corner. can now pick up the holy grail from inside,
- Ace of spades – Top left corner, man and girl playing cards. Use it on the man.
- Fish -In the middle girl standing near the tiger.
- Scissors – Use it on the tiger after giving it the fish.
- Holy grail – Top right corner, dead corpses inside the plane.
- Spear – Can be used on the top left corner, man holding a drink and naked girl, can now pick up the whiskey bottle he drops.
- Whiskey bottle – Near where you found it, top right corner man looking at notes and girl, can now pick up the crystal they drop.
- Crystal – Use it on the safe at the top right corner, can be used after giving the map a torch
Love In the Jungles
- Arrrggggh!
TV Studio Backstage
Finding Items
- Duck tape – Top left corner, girl with pink dress red studio. Second studio from the left.
- Fan – Top right, filming a space movie near the astronaut.
- Red marker – Top right corner, guy showing girls a poster, on his table. below astronaut scene.
- Pepperoni pizza – Bottom left corner, old man holding it.
- Kamasutra – Bottom left corner, looks pink, in the scene of the girl with glasses. near pizza.
Refer to using items below to continue - Wooden stick – Can only be found after using the fan on the weather girl.
- Porn Video – Can only be found after using the pizza on the news van, its inside.
- Directors t-shirt – Can only be found after using kamasutra it’s on the bed.
- Money case – Can only be found after using the directors t-shirt, its in the middle of the scene
- Fletter – Can only be found after using the porn video at the 3 monitors scene, its on the panel.
- Plume – Can only be found after using the money case in the scene with 3 girls, they drop it on the floor.
Using Items
- Pepperoni pizza – Bottom right corner, on the NEWS van, can now pickup the porn video from inside.
- Kamasutra – Top right corner, use it on the scene where people try to film a porn movie, can now pick up the t-short from the bed.
- Directors t-shirt – From the previous move, go left bottom once. Use it on the man holding his head at the bottom right corner scene, with businessman, can now pickup the money case in the middle of the scene.
- Money case – Use it at the scene with 3 girls in dressing room. below the room you picked it up. can now pick up the plume they dropped.
- Duck tape – Top right corner, use it on the guy with the camera filming the window
- Fan – Use it on the weather girl, bottom left corner, can now pickup the wooden stick.
- Porn Video – Bottom left corner, use it on the scene with guy having legs on his table, scene with 3 monitors. Can now pick up the flutter.
- Flutter – Use it on the bottom left corner corner of the screen, at the game show UCK. Above the room you picked it up. Use it on the girl.
- Red marker – Top left corner, use it on the board Business news live.
- Wooden stick – Use it on the top right, scene where they film a space movie. Ont he girl.
- Plume – Use it in the top right corner of the screen, scene with guy showing a poster. on the girls.
Show Time
- Show must go on!
Hardcore Gym Workout
Finding Items
- Porn Video – Top left corner, on the couch.
- Duck tape – Top left corner, guys flexing scene, near the cleaning bucket.
- BDSM suit – Top right corner of the map, girls changing room its purple.
- Toy box – Top right corner of the map, girls changing room, on the right.
- Viagra 2000 XXL -Top right corner of the map, can be found near the toilets (its green). Under previous room.
- Water bottle – Bottom right corner of the map at the bar scene on the counter.
- Wrench – Bottom right corner of the map, in the orange car.
- Plush rat – Middle bottom of the map, click on the green dumpster to open it and pick it up.
- Banana peel – Middle down of the map, between the two cars.
- Paper with password (1,2,3) – Bottom left corner of the screen, scene with girl and two guys. The room above the car.
- 120 kg weight – At the gym scene near the two girls on the middle left.
Refer to Using Items below to continue. - Permanent marker – Can only be found after using the wrench on the girl on the ladder, it s on the floor.
- Syringe – Can only be picked up after using the paper with password on the syringe machine, its inside.
- Multi key – Can only be picked up after fixing the electricity cable with the duck tape, its on the computer desk.
- Plush rat – Middle bottom of the map, click on the green dumpster to open it and pick it up.
Using Items
- Water bottle – Can be use at the middle left of the screen at the gym, girl punching a robot.
- 20 kg weight – Use it on the top left corner of the map at the gym, girl with white pants.
- Banana peel – Use ot at the middle left gym scene, guy with an erection
- Wrench – Top left corner of the map, girl on the ladder. Can now pick up the marker.
- Porn video -Top right corner of the map, use it on the vcr and tv, scene with 6 people
- Toy box – Use it on the middle right part of the screen, 3 girls in the toilets.
- Paper with password (1,2,3) – Use it on the machine with a syringe, top middle of the screen, doctor with a fat lady. can now pick up the syringe.
- Plush rat – Use it on the top middle of the map, rat biting the electric cable, same room with the syringe.
- Viagra 2000 XXL – Middle of the map, yellow sauna scene guy sitting with 3 girls, below the syringe room.
- Duck tape – Bottom right corner of the screen, use it on the blue cable near pc with electricity coming out, below the viagra 2000 XXL room. Can now pick up the key.
- Permanent market – Use it on the clock at the bottom middle of the screen, 3 girls on dancing poles, next to the room you used duck tape in.
- BDSM suit – Use it on the girl at the bottom left corner of the screen, where you found the password.
- Multi key – Use it on the girl hiding from the guys flexing, top left corner of the map.
- Syringe – Use it on the top right corner of the map,blonde guy sitting at the toilet
Pumping Iron
- And fine motor skills…
In A Black Hole Far Far Away
Finding Items
- Droid hand – Blue hand can be found at the top right corner of the map, on the boxes.
- Rocket fuel – Can be found at the middle right of the screen, between jubba the hut, and red bed.
- Red acces card – Bottom right corner of the map, behind star wars droids.
- High tech vibrator – Can be found at the bottom right corner of the map, at the strip club scene, behind robot with pink shirt.
- Awesome mix – Can be found in the middle of the map, on the stage of a band with purple hair.
- Steam valve #2 – Can be found on middle left of the screen, on the white robot the two girls are controlling (below where you used vibrator on).
Refer to Using Items below to continue and come back when you need the valves. - Steam valve #1 – Can be found on the bottom right corner of the map, its on the floor.
- Steam valve #3 – Can be found on the red bed where the girl was, middle right of the screen.
- Blue access card – Can only be found after using the awesome mix on the yellow robot, its at the bottom of the truck.
- Reactor part #2 – Can be found after using the high tech vibrator, its in the room that got blown up, inside the blue bag.
- Pocket rocket bomb – Can be found at the bottom left corner of the map on the shelf. only after using the red key card.
- Love Potion – Can be found after using the droid hand on the slot, its inside the room.
- Reactor part #3 – Can be find at the bottom right corner of the map, in the blue room, after using the blue keycard.
- Reactor part #1 – Can only be found after using rocket fuel on the rick and morty characters, it falls out of the portal.
- Red face- Can be found in the middle bottom of the screen, click on the red container to open it, its inside.
Using Items
- Awesome mix -Can be used on the yellow robot inside the yellow truck, bottom left of the screen, can now pick up the blue card.
- High tech vibrator – Can be used on the 2 girls piloting the ship at the top left corner, above the yellow robot. can now pickup the reactor part #2 from the room they shot in, inside the blue bag.
- Red access card – Use it on in the top right corner of the map, on the DO NOT DISTURB screen. Can now pick up the rocket bomb in the room shown in the TV screen.
- Blue Access card – Can be used on the blue screen at the top right corner of the map, next to the red you just used. Can now get access to the blue room shown on the screen, and take the reactor part #3.
- Rocket fuel – Use it on the top right corner of the map, on the rick and morty looking characters. Can now pickup reactor part #1.
- Pocket rocket bomb – Can be used on the cow in the bottom middle of the screen.
- Droid hand – Can be used after blowing up the cow, on the hand slot. Can now pick up the love potion from inside.
- Love potion – Use it in the middle top of the screen, on the water cooler, near the strip club sign.
- Reactor part #1- #3 – Use it on the girl with green suit, at the middle top right of the map
- Steam valve #1-#3 – Use it on the bottom right part of the map, on the blue notches.
- Red face – Use it on the man and girl at the bottom left corner of the map (where you got the bomb)
Far Far Away
- Droids you’re looking for!
Release Radar: Our pick of the week’s best TV, movies, and games (February 17-23) – GW
The best games, movies, and shows of the next seven days
1. This Bayonetta and Vanquish bundle is all about bangs for your buck
When: February 18
Where: PS4 and Xbox OneÂ
2. Fortnite Chapter 2 Season 2 is finally happening, and we still know precious little about it
When: February 20
Where: PC, PS4, Xbox One, Nintendo Switch, iOS, Android
3. Bust out your bonnet for a 2020 take on Emma
When:Â February 21
Where:Â Movie theatersÂ
4. Get some Mandalorian methadone with Star Wars: The Clone Wars: Season 7 on Disney Plus
When:Â February 21
Where:Â Disney Plus
5. Better Call Saul can finally overtake Breaking Bad in season 5
When: February 23
Where: AMC (US) Netflix (UK)


